ELEKIT PS-3250 Phono stage MM/MC $105.00
PS-3250 works well with TU-8200
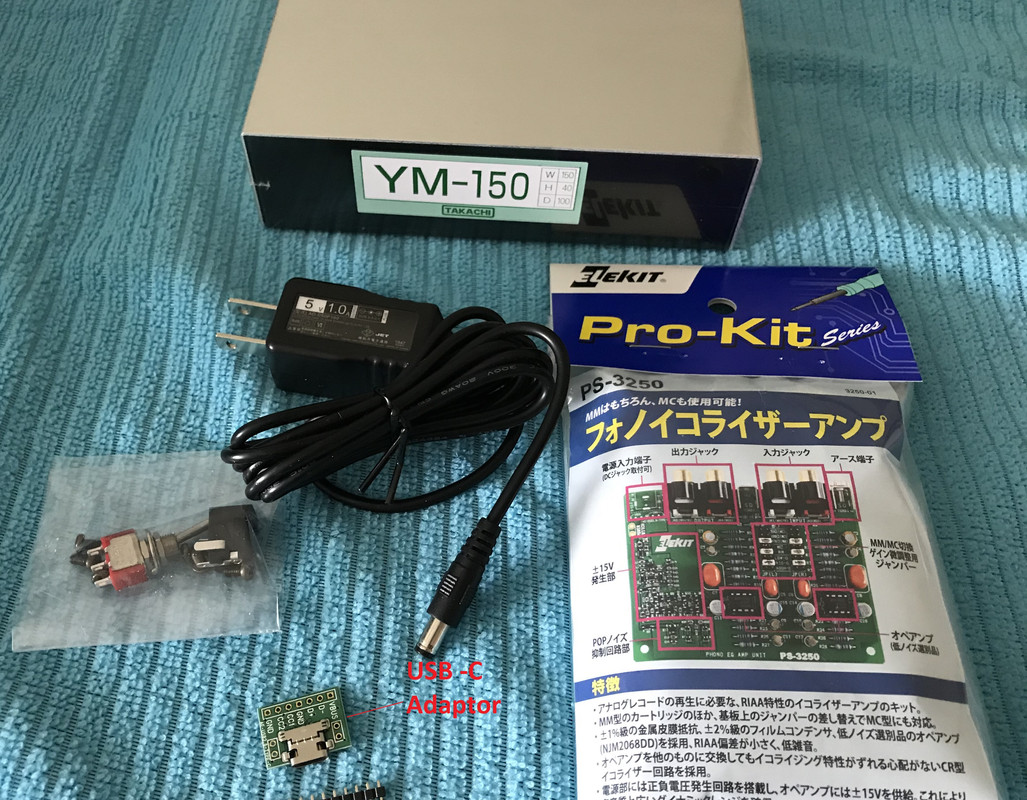
Itatakachi YM -150 case + the DC input socket +PS-325. All for $195 (available NOW)
The box set includes; $195
1. ELEKIT PS-3250
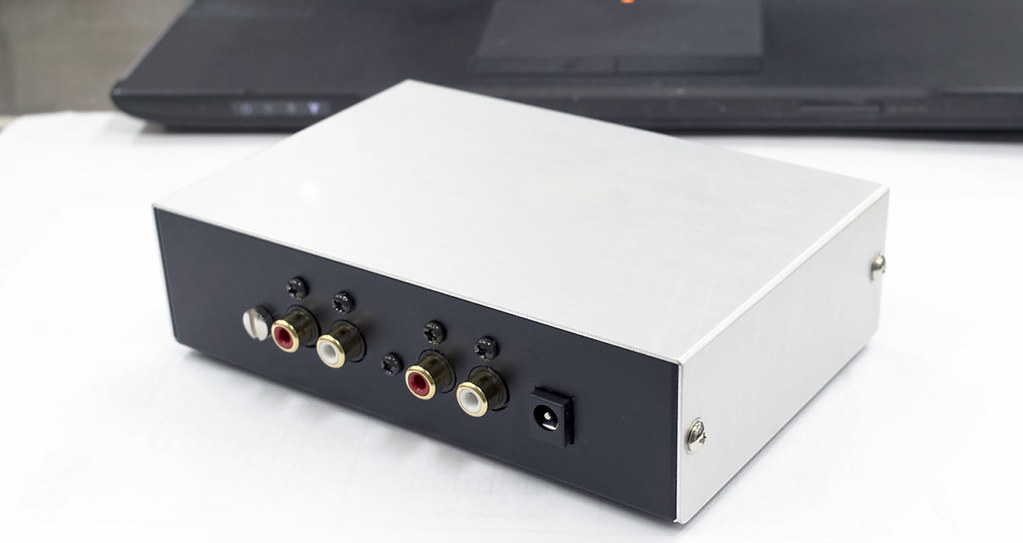
2. Metal box x 1 pcs Tatakachi YM-150 (pre-drilled)
3. DC jack x 1 pcs
4. Switching AC adapter (5V1A) x 1 pcs
5. 3P toggle SW : x 1 pcs
6. Screw M3 x 6 : 5pcs
7. Alternative source of power supply : USB type C adaptor - to use phone battery ADD: $7.50)
. Cartridge / MM type (about 47 kΩ), MC type (about 100 Ω or 30 Ω)
. Circuit configuration / CR type equalizer (RIAA), two-stage op-amp
amplification
・ RIAA deviation / within ± 0.5 dB (20 to 20 kHz)
・ Gain (@ 1kHz)
27dB (MM, LOW-G), 32dB (MM, MID-G), 36dB (MM, HIGH-G)
56dB (MC, LOW-G), 62dB (MC, MID-G), 65dB (MC, HIGH-G)
・ Non-clip maximum output (@ 1kHz) / 9V r.m.s.
・ Power supply voltage / DC 5-12V
・ Current consumption / 100mA (at 5V), 30mA (at 12V) [with NJM2068DD]
・ PCB size / 100 × 80 mm
MADE In JAPAN
Features ]
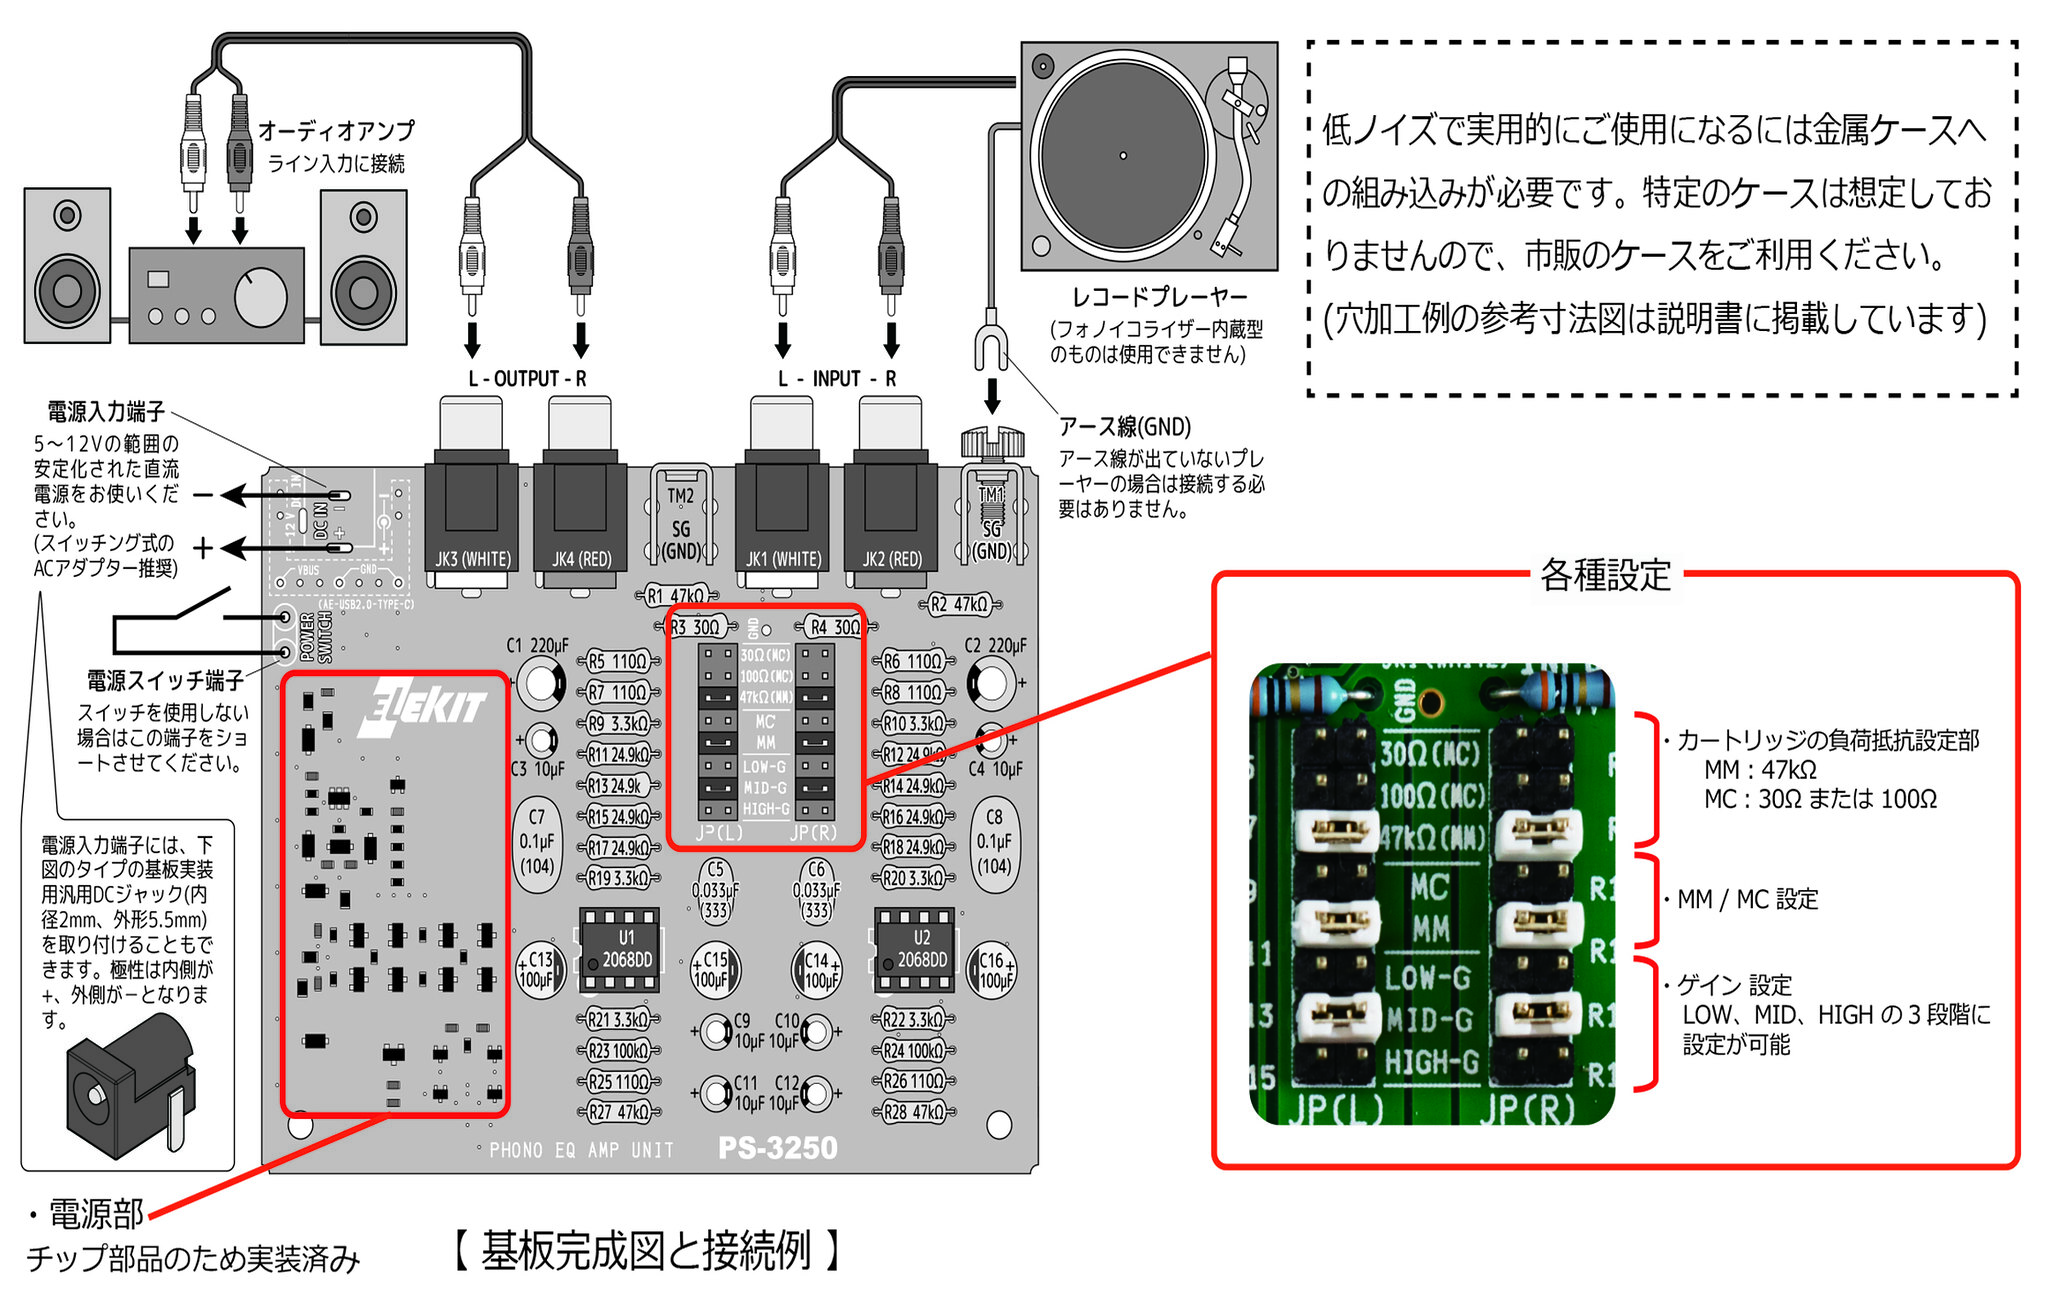
● In addition to MM type cartridges, it is also compatible with MC type cartridges by replacing jumpers on the PCB board.
The gain can also be set in 3 stages according to the output of the cartridge.
● The op-amp is NJM2068DD (low noise). The op-amp can be replaced, and you can enjoy the fun of op-amp rolling.
● CR type is used for the equalizer circuit, so even if the operational amplifier is replaced with another one, there is no concern that the equalizing characteristics will shift.
● Adopting ± 1% metal film resistors and ± 2% film capacitor, RIAA deviation is small and low noise.
● The power supply section is equipped with a positive / negative voltage generation circuit. High sound quality and wide dynamic range are secured by supplying ± 15V to the op-amplifier.
● Equipped with a POP noise suppression circuit when the power is turned on / off.
● Since the level of noise (especially hum) is greatly affected by the routing of the input / output lines and the ground point of the equalizer amplifier, this kit comes with an input / output jack for mounting on the board, and a grounding bracket.

Prepare PS-3250 first by soldering it. You also require these parts that are not included in the kit: DC jack, aluminum case, M3, and 5 screws about 8mm long. These parts are included if you purchase the $99 package.
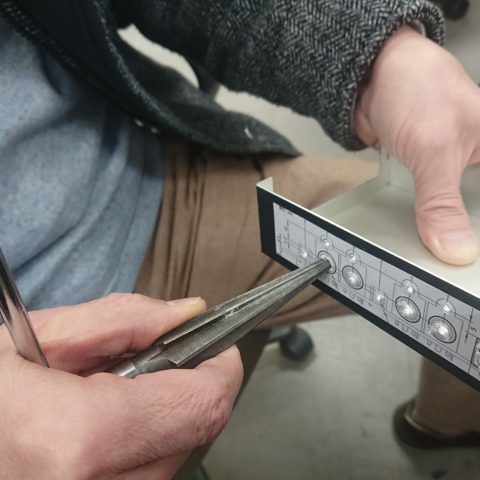
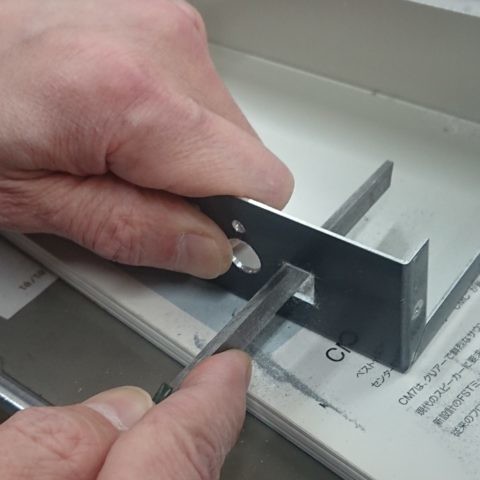
For metal processing your will require center punches, reamers, metal files, drill bits for aluminum and drills.

takachi ym-180 case (pre-drilled after July 11, 2021)

Pre drilled BOX - after July 11, 2021
 https://flic.kr/p/2maL1bp
https://www.flickr.com/photos/64593884@N08/
https://flic.kr/p/2maL1bp
https://www.flickr.com/photos/64593884@N08/

DC 12V (solder the DC Jack - does not include in the kit)
The DC jack used has an outer diameter of 5.5 mm and an inner diameter of 2.1 mm.
The inner pin is positive and the outer and outer peripheries are negative.
The AC adapter uses the same standard plug, 5V-12V.
"2.1mm standard jack".

USB power source - from phone power or battery pack


Case Preparation (as at July 11, 2021... Pre-drilled)

1. Make a copy of the floor plan found on page 4 in the menu
2. Cut out the floor plan and attach it to the back of the case
3. Follow the guides on the floorplan to drill the holes on the case


[


PS-3250 works well with TU-8200
Itatakachi YM -150 case + the DC input socket +PS-325. All for $195 (available NOW)
The box set includes; $195
1. ELEKIT PS-3250
2. Metal box x 1 pcs Tatakachi YM-150 (pre-drilled)
3. DC jack x 1 pcs
4. Switching AC adapter (5V1A) x 1 pcs
5. 3P toggle SW : x 1 pcs
6. Screw M3 x 6 : 5pcs
7. Alternative source of power supply : USB type C adaptor - to use phone battery ADD: $7.50)
. Cartridge / MM type (about 47 kΩ), MC type (about 100 Ω or 30 Ω)
. Circuit configuration / CR type equalizer (RIAA), two-stage op-amp
amplification
・ RIAA deviation / within ± 0.5 dB (20 to 20 kHz)
・ Gain (@ 1kHz)
27dB (MM, LOW-G), 32dB (MM, MID-G), 36dB (MM, HIGH-G)
56dB (MC, LOW-G), 62dB (MC, MID-G), 65dB (MC, HIGH-G)
・ Non-clip maximum output (@ 1kHz) / 9V r.m.s.
・ Power supply voltage / DC 5-12V
・ Current consumption / 100mA (at 5V), 30mA (at 12V) [with NJM2068DD]
・ PCB size / 100 × 80 mm
MADE In JAPAN
Features ]
● In addition to MM type cartridges, it is also compatible with MC type cartridges by replacing jumpers on the PCB board.
The gain can also be set in 3 stages according to the output of the cartridge.
● The op-amp is NJM2068DD (low noise). The op-amp can be replaced, and you can enjoy the fun of op-amp rolling.
● CR type is used for the equalizer circuit, so even if the operational amplifier is replaced with another one, there is no concern that the equalizing characteristics will shift.
● Adopting ± 1% metal film resistors and ± 2% film capacitor, RIAA deviation is small and low noise.
● The power supply section is equipped with a positive / negative voltage generation circuit. High sound quality and wide dynamic range are secured by supplying ± 15V to the op-amplifier.
● Equipped with a POP noise suppression circuit when the power is turned on / off.
● Since the level of noise (especially hum) is greatly affected by the routing of the input / output lines and the ground point of the equalizer amplifier, this kit comes with an input / output jack for mounting on the board, and a grounding bracket.
Prepare PS-3250 first by soldering it. You also require these parts that are not included in the kit: DC jack, aluminum case, M3, and 5 screws about 8mm long. These parts are included if you purchase the $99 package.
For metal processing your will require center punches, reamers, metal files, drill bits for aluminum and drills.
takachi ym-180 case (pre-drilled after July 11, 2021)
Pre drilled BOX - after July 11, 2021
https://flic.kr/p/2maL1bp
https://www.flickr.com/photos/64593884@N08/
DC 12V (solder the DC Jack - does not include in the kit)
The DC jack used has an outer diameter of 5.5 mm and an inner diameter of 2.1 mm.
The inner pin is positive and the outer and outer peripheries are negative.
The AC adapter uses the same standard plug, 5V-12V.
"2.1mm standard jack".
USB power source - from phone power or battery pack
Case Preparation (as at July 11, 2021... Pre-drilled)
1. Make a copy of the floor plan found on page 4 in the menu
2. Cut out the floor plan and attach it to the back of the case
3. Follow the guides on the floorplan to drill the holes on the case
[
Last edited: