I like putting handsome indicator LEDs like the one below on the front panel of stuff I build.

But I also like those lovely 10mm thick brushed aluminum front panels from Modushop.
Problem is: I’ve not yet found an indicator LED with threads long enough to reach all the way through the 10mm panel. On my last amp I drilled out a massive hole to fit the nut into. It’s still very hard to fasten & unfasten the LED.
How do you folks attach panel-mount LEDs to thick front panels? Or do you? Hs anyone found a panel-mount with 12mm thread? Snap-ins that work? What about T-nuts which can be turned with a wrench?
Any clever ideas?
Counterbore from the back or tap (thread) the front panel (yech).
Counterboring from the back necessitates a flat bottom cutter but a well chosen flat washer could be made to work as well. Use a lock washer with the flat.
Counterboring from the back necessitates a flat bottom cutter but a well chosen flat washer could be made to work as well. Use a lock washer with the flat.

I've used a router on aluminium before.
I'd probably use a drill press to remove as much material as possible first and then use a router to remove the left over bits. Make a jig if you want a perfect circle or square for the recess. Maybe use some cutting fluid.
Rob.
I'd probably use a drill press to remove as much material as possible first and then use a router to remove the left over bits. Make a jig if you want a perfect circle or square for the recess. Maybe use some cutting fluid.
Rob.
OOOOHHHH.... Tap the hole myself! I hadn't thought of that. I already tap my own heatsinks for transistor mounting, and I've gotten pretty good at that.
My favorite LED is M8 thread - $13.29 for the tap from Home Depot
Counterboring requires a huge drill bit, and I don't have a flat-bottom cutter. Tapped hole may be the way to go.
My favorite LED is M8 thread - $13.29 for the tap from Home Depot
Counterboring requires a huge drill bit, and I don't have a flat-bottom cutter. Tapped hole may be the way to go.
Unfortunately, I don't have access to a drill press. I've asked friends & co-workers. No one (claims to ) has a drill press.
If these are too short to snap in from the front you can glue them to the back.
Looks good either way.
https://www.digikey.com/en/products/detail/keystone-electronics/8310/2745970
https://www.keyelco.com/userAssets/file/M65p94.pdf
Looks good either way.
https://www.digikey.com/en/products/detail/keystone-electronics/8310/2745970
https://www.keyelco.com/userAssets/file/M65p94.pdf
Another approach is to drill a small hole, say, 1.5-2 mm in diameter through the panel. Then you drill with a 5 mm drill from the inside to create a counterbore. It doesn't have to be flat at the bottom. Then epoxy the LED in place from the inside. I did that on the Modulus-286 Kit LE I sold years ago.


Tom
Tom
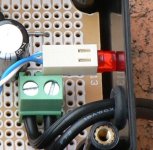
I did a similar thing but used an LED without a flange on thicker front panels and with a flange on thinner ones. Held in place by self adhesive foam on the back side with a punched hole which grips the LED or wires and BluTack also works. Not good examples but gives an idea and later build used connectors instead of soldering.
Attachments


OOOOHHHH.... Tap the hole myself! I hadn't thought of that. I already tap my own heatsinks for transistor mounting, and I've gotten pretty good at that.
My favorite LED is M8 thread - $13.29 for the tap from Home Depot
Unfortunately, I don't have access to a drill press. I've asked friends & co-workers. No one (claims to ) has a drill press.
You can buy a 'drill and tap' set that will work in your battery drill. No Press needed 🙂
https://www.thetoolshed.co.nz/product/15624-toolshed-drill-and-tap-set
Put heatshrink over the threaded part of the LED bezel. Then drill the mounting hole to a size a tiny fraction smaller than the outside diameter of the heatshrink covered bezel, and press the bezel into the hole. Don't use the nut.
I've used flat top LEDs in the past like these:

I drill the panel out to size, tape the outside face with Mylar tape, then epoxy the LED into place from behind, flush with the outer face.
When the epoxy dries, I remove the release tape and it's good to go.
If the panel isn't finished already, I do a 'brushed aluminium & clear coat' - including the LED face - which can give a very good hidden look when turned off.
So many good ideas! I feel a bit foolish because I hadn't thought of many of these. I think I have enough ideas now. Thank you all for your help.
I've even just used the springingness of the LED wires to push the led thru the panel and hold it in place. I'd like to say it was my idea, but I got it decades ago from the way Hafler did its preamp.
That's pretty common. It works great when the LED is mounted to a PCB that's up against the panel. It doesn't work if you have a free-hanging LED.
I've used the flat top LEDs as well. That's another good approach.
Tom
I've used the flat top LEDs as well. That's another good approach.
Tom
Toms method works fine but one needs a good drill and tape on the surface.
There are LEDs with 2 mm round end but a thicker body. These are called tower LEDs. These also work out fine with the mentioned method.
There are LEDs with 2 mm round end but a thicker body. These are called tower LEDs. These also work out fine with the mentioned method.
Like this one (first pic) and I use them on thin face plates after trimming the 2mm end. A 2mm hole gives a snug fit so doesn't require other fixing.
I've seen these (second pic) on commercial gear and only transmits the light from a LED behind the front panel usually on a control PCB. Some extend some distance with bends to reach the LED.
I've seen these (second pic) on commercial gear and only transmits the light from a LED behind the front panel usually on a control PCB. Some extend some distance with bends to reach the LED.
Attachments

My process is similar to tomchr's. Drill a 3mm (or 1/8") hole from the rear face of the front panel in, stopping 2-3mm short of the front face. Drill a corresponding 1.5mm hole from the front face. A 3mm LED will fit snugly in the rear hole, kept in place with clear silicone glue. Simple, works great and the hole on the front panel is large enough to serve as an indicator but not so large as to be glaring.
I use this method to provide both source selection as well as to illuminate knobs from the rear.
Regards.
I use this method to provide both source selection as well as to illuminate knobs from the rear.
Regards.
Attachments

- Home
- Design & Build
- Construction Tips
- How do people attach panel-mount LEDs to thick front panels