Just a really quick one.
Hopefully!
I have read that there is a quick mod for the C-Note speaker's crossover that apparently involves adding a 0.22 uF poly cap.
What I can't find is where to add the cap in the xover and what it is there to achieve.
Can anybody point me where this info might be listed?
Thanks,
Rob
Hopefully!
I have read that there is a quick mod for the C-Note speaker's crossover that apparently involves adding a 0.22 uF poly cap.
What I can't find is where to add the cap in the xover and what it is there to achieve.
Can anybody point me where this info might be listed?
Thanks,
Rob
According to the links below, the modification pushes down the high frequency breakup region of the woofer more (around 8 kHz).
https://techtalk.parts-express.com/...t-bookshelf-speaker-kit-pair-other-kits/page4
"I haven't been able to hear any noticeable difference with the 0.22 uF cap across L2. Now, I don't claim to have the best ears (too much time around power tools and driving with the windows open I suppose, lol) so the difference may be there, but nothing obvious.
As jhollander pointed out, the pase shift is extremely minor and the overall response only changes by less than 1 dB. According to the simulations the .22 cap does push the peak down from -20 dB to -40 dB... Really kills it"
https://techtalk.parts-express.com/...t-bookshelf-speaker-kit-pair-other-kits/page5
"Here is the woofer response with the crossover design as is:
Blue= system response
Orange= Woofer response
Black= Woofer response with existing crossover
Here is the woofer with the additional 0.22 uF cap:
Blue= system response
Orange= Woofer response
Black= Woofer response with crossover including 0.22 uF cap"


"The leads on most cap are plenty long enough to just piggyback the cap right on top of L2... just hook one side of the cap to one side of L2 and the other side of the cap to the other side of L2 (I'm not so sure those instructions are helping anyone, lol"
https://www.avsforum.com/threads/dayton-c-note-capacitor-mod-info.3204772/
"if the instructions say to install the capacitor "across L2", it means to solder one lead of the capacitor to one lead of L2, and the other lead of the capacitor to the other lead of L2. For the circuit, if you say to put something "across" another component, it means to install it in parallel with that component."
https://techtalk.parts-express.com/...t-bookshelf-speaker-kit-pair-other-kits/page4
"I haven't been able to hear any noticeable difference with the 0.22 uF cap across L2. Now, I don't claim to have the best ears (too much time around power tools and driving with the windows open I suppose, lol) so the difference may be there, but nothing obvious.
As jhollander pointed out, the pase shift is extremely minor and the overall response only changes by less than 1 dB. According to the simulations the .22 cap does push the peak down from -20 dB to -40 dB... Really kills it"
https://techtalk.parts-express.com/...t-bookshelf-speaker-kit-pair-other-kits/page5
"Here is the woofer response with the crossover design as is:
Blue= system response
Orange= Woofer response
Black= Woofer response with existing crossover
Here is the woofer with the additional 0.22 uF cap:
Blue= system response
Orange= Woofer response
Black= Woofer response with crossover including 0.22 uF cap"
"The leads on most cap are plenty long enough to just piggyback the cap right on top of L2... just hook one side of the cap to one side of L2 and the other side of the cap to the other side of L2 (I'm not so sure those instructions are helping anyone, lol"
https://www.avsforum.com/threads/dayton-c-note-capacitor-mod-info.3204772/
"if the instructions say to install the capacitor "across L2", it means to solder one lead of the capacitor to one lead of L2, and the other lead of the capacitor to the other lead of L2. For the circuit, if you say to put something "across" another component, it means to install it in parallel with that component."
This image shows up in a Google search, but is missing at the destination now.


If you have the circuit board version of the crossover, it looks like there's solder mask on the traces everywhere except the expected soldering points. That will make soldering into traces more difficult (the green mask will need to be removed where you intend to solder). The factory holes are normally through-hole plated also to increase the solderable area and make the mechanical connection more robust.
You would probably be better off just wrapping the capacitor leads around the tinned portion of L2's leads and soldering there. The varnish on the inductor wire creates the same soldering problem, but where it's tinned the varnish has been removed already at the factory and a thin layer of solder applied.
You would probably be better off just wrapping the capacitor leads around the tinned portion of L2's leads and soldering there. The varnish on the inductor wire creates the same soldering problem, but where it's tinned the varnish has been removed already at the factory and a thin layer of solder applied.
Hi Rob.
If you search on the famous auction site for "Crossover PCBs for the C-Note" you will find for sale PCBs that are of very good quality, reasonable price, and already allow for the extra capacitor. This is the way I went for mine and am quite pleased.
--Christian
If you search on the famous auction site for "Crossover PCBs for the C-Note" you will find for sale PCBs that are of very good quality, reasonable price, and already allow for the extra capacitor. This is the way I went for mine and am quite pleased.
--Christian
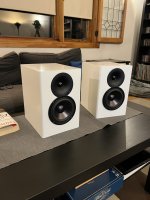
Attachments
I did the little cap mod, didn't really hear any difference. Best xover mod I did on the cnotes was just ditching it and making them active, took it from a pretty great speaker to an exceptional one.
Dennis Murphy was playing with a xover mod that just changed a few parts but all of my many attempts to get more info from him about it have been fruitless.
Dennis Murphy was playing with a xover mod that just changed a few parts but all of my many attempts to get more info from him about it have been fruitless.
Thanks for the info.
The ebai crossovers look good but are only on the US site with no international shipping mentioned.
I may use elements from the pics to make my own.
My preference is to mount the crossover directly on the speaker terminals on the back panel so I may design some that way. Saves wiring and makes them easily removable. Might have to flip the inductors orientation on the board for this too.
The other mounting option would be put 2 sets of binding posts on each speaker and put the crossovers in boxes on the outside back ready for active crossovers, although going active would be a more expensive option for later experimentation.
Unless it 'FLUKES' an audible improvement at a fixed listening position , adding a low value cap.
across a woofers C/O inductor only serves to 'smear' detail in the higher region.
Although it will create a subtle but audible difference,
I don't see the point of such a modification 😎
across a woofers C/O inductor only serves to 'smear' detail in the higher region.
Although it will create a subtle but audible difference,
I don't see the point of such a modification 😎
you can message Matt at MTG designs and he can likely ship you a crossover board.
https://www.mtg-designs.com/
https://www.mtg-designs.com/
Understood.Unless it 'FLUKES' an audible improvement at a fixed listening position , adding a low value cap.
across a woofers C/O inductor only serves to 'smear' detail in the higher region.
Although it will create a subtle but audible difference,
I don't see the point of such a modification 😎
However the guy that designed the C-Notes appears to recommend the tweak to counter an undesirable characteristic of the Al cone.
However the guy that designed the C-Notes appears to recommend the tweak to counter an undesirable characteristic of the Al cone.
huh I've met Chris several times and had my cnotes measured in house, never heard him mention that cap mod. he does have a cost is no object xover I wanted to get from him at some point.
The small cap across the inductor has been used in several projects to kill the upper woofer/mid resonance and FR issues of some metal drivers, check out Paul Carmody's RS180 designs such as the Core and Amiga for some examples.
I've used it in a Peerless 6.5" project, not a metal cone but the cap killed a nasty spike at around 3,000 Hz. I read somewhere that when you use the small cap, you should add a 8 or 10 ohm resistor to it, but knowing very little about electronics I've no idea why.
Geoff
I've used it in a Peerless 6.5" project, not a metal cone but the cap killed a nasty spike at around 3,000 Hz. I read somewhere that when you use the small cap, you should add a 8 or 10 ohm resistor to it, but knowing very little about electronics I've no idea why.
Geoff
YES, I did notice the measured change in the 5 to 7Khz region, but it comes at the cost of other things above that.
As so often occurs, their is a compromise involved. You end up with a 'cost/benefit' equation.
Adding an amount of capacitance across the woofer can result in the same 'taming' without the H.F. implications.
As so often occurs, their is a compromise involved. You end up with a 'cost/benefit' equation.
Adding an amount of capacitance across the woofer can result in the same 'taming' without the H.F. implications.
Hi @Mister Audio,
Would you mind elaborating/ being more specific? I would love to hear
1) what you heard between the variations - especially how high frequency is altered (potentially for the worse?)?
2) how does one place a capacitor across the woofer (in comparison to cap across inductor)?
Many thanks! Have a kit to be built soon, and would love to have a better understanding of what’s occurring and sound implications.
Thanks for your questions.
I mistakenly thought I was looking at a first-order woofer filter, when in fact it is second-order,
so the comment about adding capacitance across the woofer is not relevant. (silly me)
Also, the modification appears to be very effective at taming that 4 to 8Khz region but at the expense of
some distortion at higher frequencies. Having reconsidered the 'pros & cons' of the modification >
I would proceed with it. However, to make it 'perfect', you need to add a final .33mH coil in series
with the woofer to filter the 'very high frequency' distortion. (high quality low-loss .33mH)
Sorry for my earlier misleading comments.
Last edited:
PLEASE NOTE :
There is another fairly serious problem with the modification that is so obvious I failed to notice it 😕
If you look at the circuit, you will notice that the .22uF and 6.8uF caps. are in series creating a direct
high frequency path straight to ground (-). This is the same as putting a capacitor across your box input terminals.
This is not a recommended thing to do. Some amplifiers might not like it at all and will drop your impedance to
very low at 'super-high' frequencies. Also, it will make the 'Air & Sparkle' of your speakers very dependent
on the amplifier being used.
All I can say now is, if I was building these speakers > I would wire the .22uF with a switch so as to be able to
'listen & pick' the most favorable sound.
Never seen the impedance curve.
I'll be " positive" and not expect the usual 25 ohm peak
at the crossover point and a 4 ohm dip at the high end.
Series resistance with the cap will help compensate if so.
Or just use normal 3rd order for steeper filter slope.
Extra coil instead of cap.
Maybe similar price, as long as you dont think 500 watt coils
are needed for 20 watt speakers.
impedance curve?
off axis response?
designed crossovers with these drivers before.
ND25 with waveguide is a pain.
I can get it flat with 3rd or 4th order and basic impedance compensation.
Otherwise with 2nd order usually garbage 25 to 30 ohm peak and
low dip up higher.
off axis response?
designed crossovers with these drivers before.
ND25 with waveguide is a pain.
I can get it flat with 3rd or 4th order and basic impedance compensation.
Otherwise with 2nd order usually garbage 25 to 30 ohm peak and
low dip up higher.
- Home
- Loudspeakers
- Multi-Way
- C-Note crossover mod