After all the excellent info and help I've received from this and other online forums, I wanted to give back at least a little re my recent Infinity Walsh tweeter rebuild / diaphragm replacement. I was hoping to improve the efficiency and power handling if possible. It came out great, a little louder than my other all-original one with slightly better dynamics on loud transients. I'm running a separate 50W/ch HF amp with 3.5kHz 12dB/octave passive line-level crossovers (Harrison Labs) + 10uF Solen coupling caps for a total of 18dB/oct. These tweeters never cease to amaze me - all kinds of music, dialogue, falling rain on pavement, wind in tree leaves, cymbals/hi-hats/bells etc, shell casings  - you name it.
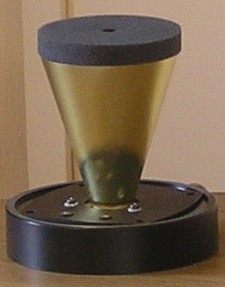
The base is machined Delrin, and I also had 'top hats' made that I didn't use (blocked out too much top radiation). I have diagrams for both if anyone needs them.
I tried unwinding & resoldering the voice coil wire after reading about it online, but it was too damaged to salvage. The voice coil was partially burnt black; I was amazed, as these tweeters were bought NIB from Infinity in the late '80s and sat untouched in their boxes for 30+ years, then used less than an hour before one failed on a loud snap-transient, blowing a 1A inline fuse. Now that it's apart I'm sure it was repaired and re-sold as "new", as the diaphragm center-hole cutting and cone gluing were awful (the other one looks perfect). I think the transient may have caused this already burnt coil to DC-short to the gap OD. The center post had a huge off-center blob of epoxy at its base which rubbed the new diaphragm. With careful taping and a little luck, I managed to Dremel this away without cutting into metal or filling the gap with crap.
After a trip to my machinist for advice and punching holes thru several ebay titanium diaphragms, I ended up using the one below ('scarlettchen' at ebay). The diamond-shaped surround stampings add a lot of stiffness & support:
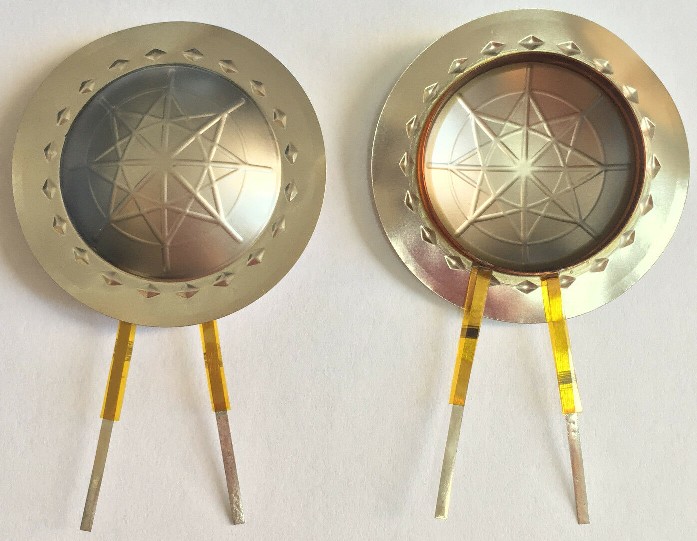
The titanium in this diaphragm's dome is thick enough to punch, but the punch should be fresh and tight (my machinist's wasn't, but it still made a fairly clean .75" hole). The coil got torqued a little in the process though, so I ordered another & cut the hole by hand using a disposable scalpel & 4" Fiskars scissors (came out OK, but a little close on one side which made epoxying scary later). If I was rebuilding a conventional dome tweeter I would've preferred a thinner diaphragm, but supporting a big aluminum cone is a heavy lift for a tweeter, and with one possibly alignment-related blowout already I'd rather be safe than sorry this time. This unit also has twice the OEM winding length, which should significantly improve thermal power handling.
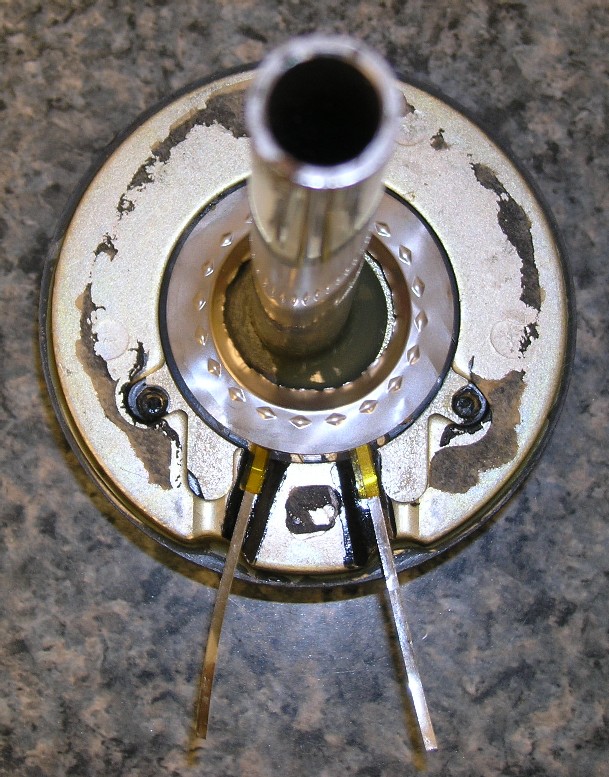
This diaphragm's flat, angled leads required ground channels in the plastic washer & top of the base (magnet structure) for the leads to fit into, which were painted for insulation / easy sliding / rustproofing.
The OEM diaphragm uses a precision plastic washer for clamping & centering which fits into an equally precise circular recess in the base, and worked just fine. After making up a 1"-diameter paper shim with 25lb smooth-stock paper and fitting it to the pole piece, I put the washer in the recess, applied 4 small drops of contact cement to the top of it, then immediately slid the voice coil over the shim & the diaphragm down on the washer / glue drops (no drying time before contact) & screwed down the top flange plate medium-tight. This is not the way contact cement is normally used, but the diaphragm centered perfectly on the thinly-spread wet glue w/no excess, and came out great. The contact-cement joint only has to hold the diaphragm & washer together when they're removed to pull the shim out, which wasn't easy... I ended up sliding pieces of Scotch tape down each side of the gap, & luckily one of them stuck to the shim paper enough to pull it out.
After cutting, grinding, and painting:
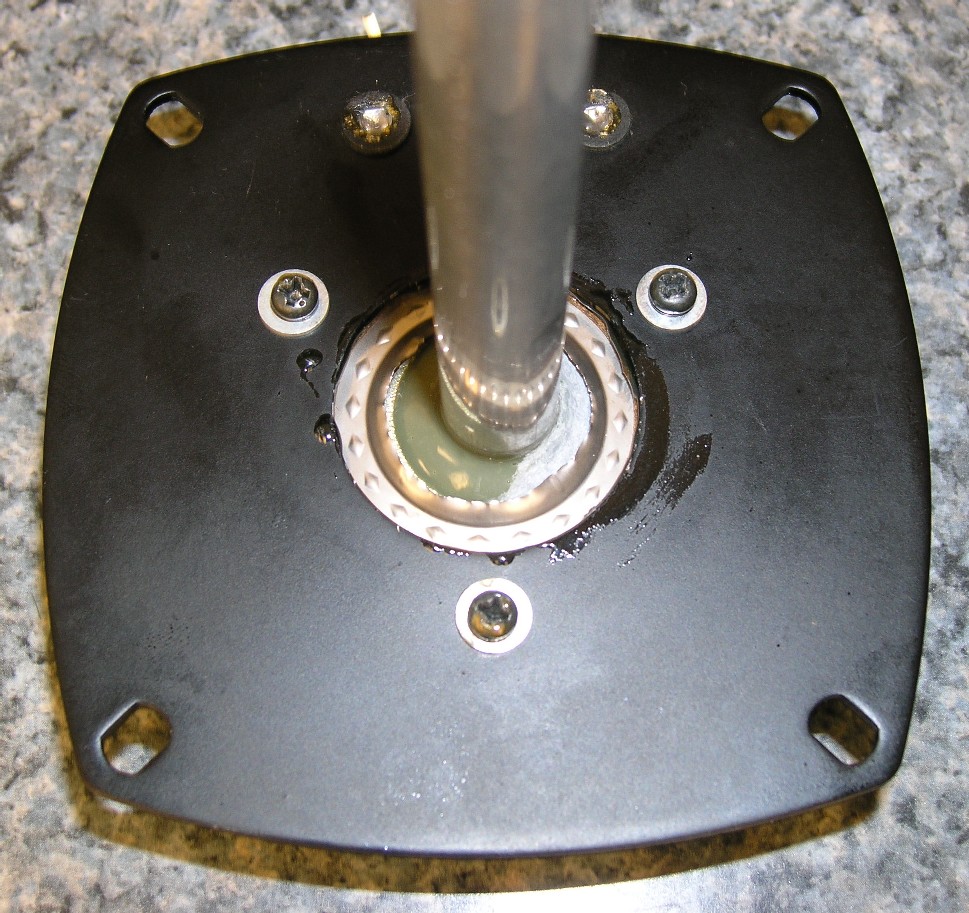
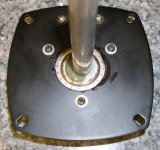
Top plate on:
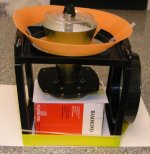
I then set up the gluing jig (below).
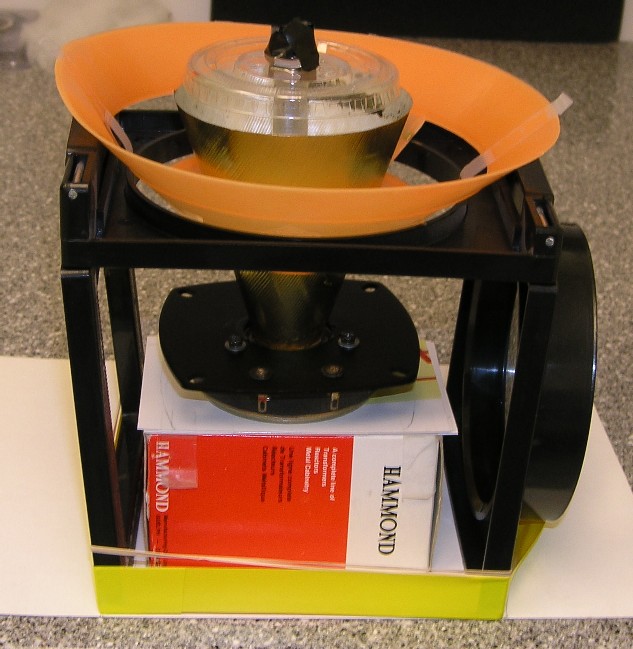
It took a ton of fiddling with cardboard height shims on the center box, the clear cup lid centering aid, the orange 'funnel', etc. to get everything aligned - I also had to figure out an 'escape plan' to get the completed tweeter out of the jig after the cone was glued in place - and then many dry runs inserting & aligning the cone quickly and correctly, but finally I managed to to epoxy it to the diaphragm. I looked at a number of epoxies - many were opaque and/or set up too quickly for my taste - finally settling on Devcon 14251 clear epoxy (2-part syringe, 8-10 min. set time, 12 hr cure). I painted the epoxy on the surround/VC OD area & applied it to the cone edge with my fingertip, lowered the cone thru the jig and onto the diaphragm, then added extra epoxy to the bottom cone ID with the brush. I'd recommend absolutely NO caffeine, and a good night's sleep beforehand.
24 hrs later, I cut away two large sections of the orange funnel thing, slid it to the side & removed it, then lifted the tweeter out thru the jig center opening from the bottom. I tested it with .25W / 10Hz (no VC rubbing heard or felt), then 1W 2khz - 20kHz sine/square sweeps; as expected some weak resonances were present, but nothing major.
I got more Polyfil on Amazon, but my original stuff was pre-cut to size & still good so I re-used it. It had packed down a bit, so I pulled it up & apart so it nearly filled the entire cone loosely.
Next was the foam. I wanted precisely-cut foam circles and wasn't impressed with Infinity's single undersized one, so I went with something that to my ears worked better - two different foams, each for its own task. These were waterjet-cut by Foam N' More (www.foamforyou.com) for a very reasonable price - Michelle was extremely helpful. After trying several things, here's what I ended up using:
Foam 1 (in top ID of cone): Regicell 30 ppi polyethylene reticulated, black, 0.5" thick, .375" ID / ctr hole, 3.25" OD
This foam supports & centers the cone, and damps mechanical resonances in the moving system. It compresses readily but is stiffer than Foam 2 below, & is @ 90% acoustically transparent. Foam N' More stocks it, in 24 x 36" sheets (1 sheet minimum). I trimmed the bottom edge OD slightly so it would slide into the cone without binding. I was very careful not to let it snag the cone edge or stress the cone in any way.
Foam 2 (fits flush on top of Foam 1): 80 ppi polyurethane reticulated, black, 0.5" thick, .375" ID, 3.35" OD
This foam damps the reflected wave into the cone interior, minimizing acoustic resonances. It is softer and denser than Foam 1, and is @ 20-30% acoustically transparent. This foam appears identical to what Infinity used, and was not easy to find - Merryweather Foam makes it (p/n 80PPI.5"XHALF I think, www.merryweather.com) and Nick there was kind enough to send me free samples as they have huge minimum orders. I then sent the sample foam to Foam N' More for cutting, which they were happy to do. Nearly any open-cell 80-100 ppi polyurethane foam should work fine for Foam 2 in a 2-foam setup, and for a single-foam Infinity setup if it's stiff enough (like the Merryweather foam) AND sized correctly to not stress the cone glue seam (3.20" OD, trim bottom edge if needed).
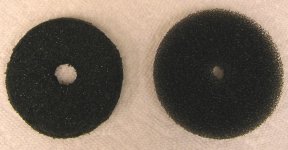
Here's the OEM foam on the left (@ 3.125" OD, degraded) and the new 30 ppi Regicell foam on the right (3.40" OD, way too big - it was my 1st attempt). The new foam's center hole looks like crap in this pic, but it's perfectly round & centered. The 80 ppi polyurethane foam mentioned above is shown in my 1st pic, it looks nearly identical to the OEM foam below.

I used the tweeters for a while with no foam at all (just Polyfil), and also with only Foam 2 placed just above the cone edge. With Polyfil-only they were noticeably louder (especially from the top - mine reflect off a 45° knee wall 14" above), with more hi-mids & an edgy / sibilant tone. Adding Foam 2 dropped the reflected level & mids a lot, but the edginess remained until both foams were used w/Foam 1 contacting the cone, when it instantly vanished.
Well, that's about it for the rebuild. I also made up a tweeter protector for these so (hopefully) this ordeal will never be repeated, and at some point I'll post about that. I might also have the rest of the Merryweather sample foam cut for sale on ebay at some point. The pics aren't displaying as I hoped they would, any suggestions appreciated.
The base is machined Delrin, and I also had 'top hats' made that I didn't use (blocked out too much top radiation). I have diagrams for both if anyone needs them.
I tried unwinding & resoldering the voice coil wire after reading about it online, but it was too damaged to salvage. The voice coil was partially burnt black; I was amazed, as these tweeters were bought NIB from Infinity in the late '80s and sat untouched in their boxes for 30+ years, then used less than an hour before one failed on a loud snap-transient, blowing a 1A inline fuse. Now that it's apart I'm sure it was repaired and re-sold as "new", as the diaphragm center-hole cutting and cone gluing were awful (the other one looks perfect). I think the transient may have caused this already burnt coil to DC-short to the gap OD. The center post had a huge off-center blob of epoxy at its base which rubbed the new diaphragm. With careful taping and a little luck, I managed to Dremel this away without cutting into metal or filling the gap with crap.
After a trip to my machinist for advice and punching holes thru several ebay titanium diaphragms, I ended up using the one below ('scarlettchen' at ebay). The diamond-shaped surround stampings add a lot of stiffness & support:
The titanium in this diaphragm's dome is thick enough to punch, but the punch should be fresh and tight (my machinist's wasn't, but it still made a fairly clean .75" hole). The coil got torqued a little in the process though, so I ordered another & cut the hole by hand using a disposable scalpel & 4" Fiskars scissors (came out OK, but a little close on one side which made epoxying scary later). If I was rebuilding a conventional dome tweeter I would've preferred a thinner diaphragm, but supporting a big aluminum cone is a heavy lift for a tweeter, and with one possibly alignment-related blowout already I'd rather be safe than sorry this time. This unit also has twice the OEM winding length, which should significantly improve thermal power handling.
This diaphragm's flat, angled leads required ground channels in the plastic washer & top of the base (magnet structure) for the leads to fit into, which were painted for insulation / easy sliding / rustproofing.
The OEM diaphragm uses a precision plastic washer for clamping & centering which fits into an equally precise circular recess in the base, and worked just fine. After making up a 1"-diameter paper shim with 25lb smooth-stock paper and fitting it to the pole piece, I put the washer in the recess, applied 4 small drops of contact cement to the top of it, then immediately slid the voice coil over the shim & the diaphragm down on the washer / glue drops (no drying time before contact) & screwed down the top flange plate medium-tight. This is not the way contact cement is normally used, but the diaphragm centered perfectly on the thinly-spread wet glue w/no excess, and came out great. The contact-cement joint only has to hold the diaphragm & washer together when they're removed to pull the shim out, which wasn't easy... I ended up sliding pieces of Scotch tape down each side of the gap, & luckily one of them stuck to the shim paper enough to pull it out.
After cutting, grinding, and painting:
Top plate on:
I then set up the gluing jig (below).
It took a ton of fiddling with cardboard height shims on the center box, the clear cup lid centering aid, the orange 'funnel', etc. to get everything aligned - I also had to figure out an 'escape plan' to get the completed tweeter out of the jig after the cone was glued in place - and then many dry runs inserting & aligning the cone quickly and correctly, but finally I managed to to epoxy it to the diaphragm. I looked at a number of epoxies - many were opaque and/or set up too quickly for my taste - finally settling on Devcon 14251 clear epoxy (2-part syringe, 8-10 min. set time, 12 hr cure). I painted the epoxy on the surround/VC OD area & applied it to the cone edge with my fingertip, lowered the cone thru the jig and onto the diaphragm, then added extra epoxy to the bottom cone ID with the brush. I'd recommend absolutely NO caffeine, and a good night's sleep beforehand.
24 hrs later, I cut away two large sections of the orange funnel thing, slid it to the side & removed it, then lifted the tweeter out thru the jig center opening from the bottom. I tested it with .25W / 10Hz (no VC rubbing heard or felt), then 1W 2khz - 20kHz sine/square sweeps; as expected some weak resonances were present, but nothing major.
I got more Polyfil on Amazon, but my original stuff was pre-cut to size & still good so I re-used it. It had packed down a bit, so I pulled it up & apart so it nearly filled the entire cone loosely.
Next was the foam. I wanted precisely-cut foam circles and wasn't impressed with Infinity's single undersized one, so I went with something that to my ears worked better - two different foams, each for its own task. These were waterjet-cut by Foam N' More (www.foamforyou.com) for a very reasonable price - Michelle was extremely helpful. After trying several things, here's what I ended up using:
Foam 1 (in top ID of cone): Regicell 30 ppi polyethylene reticulated, black, 0.5" thick, .375" ID / ctr hole, 3.25" OD
This foam supports & centers the cone, and damps mechanical resonances in the moving system. It compresses readily but is stiffer than Foam 2 below, & is @ 90% acoustically transparent. Foam N' More stocks it, in 24 x 36" sheets (1 sheet minimum). I trimmed the bottom edge OD slightly so it would slide into the cone without binding. I was very careful not to let it snag the cone edge or stress the cone in any way.
Foam 2 (fits flush on top of Foam 1): 80 ppi polyurethane reticulated, black, 0.5" thick, .375" ID, 3.35" OD
This foam damps the reflected wave into the cone interior, minimizing acoustic resonances. It is softer and denser than Foam 1, and is @ 20-30% acoustically transparent. This foam appears identical to what Infinity used, and was not easy to find - Merryweather Foam makes it (p/n 80PPI.5"XHALF I think, www.merryweather.com) and Nick there was kind enough to send me free samples as they have huge minimum orders. I then sent the sample foam to Foam N' More for cutting, which they were happy to do. Nearly any open-cell 80-100 ppi polyurethane foam should work fine for Foam 2 in a 2-foam setup, and for a single-foam Infinity setup if it's stiff enough (like the Merryweather foam) AND sized correctly to not stress the cone glue seam (3.20" OD, trim bottom edge if needed).
Here's the OEM foam on the left (@ 3.125" OD, degraded) and the new 30 ppi Regicell foam on the right (3.40" OD, way too big - it was my 1st attempt). The new foam's center hole looks like crap in this pic, but it's perfectly round & centered. The 80 ppi polyurethane foam mentioned above is shown in my 1st pic, it looks nearly identical to the OEM foam below.
I used the tweeters for a while with no foam at all (just Polyfil), and also with only Foam 2 placed just above the cone edge. With Polyfil-only they were noticeably louder (especially from the top - mine reflect off a 45° knee wall 14" above), with more hi-mids & an edgy / sibilant tone. Adding Foam 2 dropped the reflected level & mids a lot, but the edginess remained until both foams were used w/Foam 1 contacting the cone, when it instantly vanished.
Well, that's about it for the rebuild. I also made up a tweeter protector for these so (hopefully) this ordeal will never be repeated, and at some point I'll post about that. I might also have the rest of the Merryweather sample foam cut for sale on ebay at some point. The pics aren't displaying as I hoped they would, any suggestions appreciated.
Attachments
-
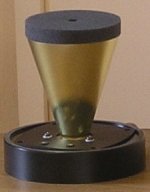 1 Walsh Infinity driver & base.jpg14.1 KB · Views: 936
 -
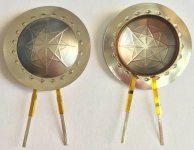 2 Titanium Diaphragm (eBay, scarlettchen).jpg92.9 KB · Views: 823
 -
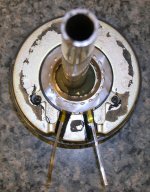 3 Ready for Top Plate (small).jpg164.3 KB · Views: 754
 -
 4 Ready for Cone (small).jpg252.1 KB · Views: 760
 -
 5 Cone Jig (small).jpg94.9 KB · Views: 747
 -
 6 OEM 3.125 OD & 30 ppi Regicell 3.40 OD foam (small).jpg86.7 KB · Views: 681
Last edited: