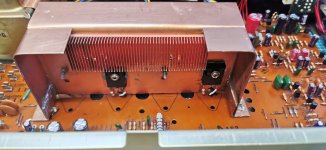
all in now.It needs a clean up, but what a shame about the 3rd transistor down, the print came off and broke so i had to do a repair.
I have to decide now if to take it of and connect with wire or leave it.
It just looks scruffy like this
would you leave it or take it off and connect it up more neatly with wire?
so much better access around the amp now
before and after photos, and the set up now complete.Ive not removed or modified for driver removal yet, ill try the amp first with them in to make sure it all works first.
Attachments


It needs a clean up, but what a shame about the 3rd transistor down, the print came off and broke so i had to do a repair.
I'd leave it. You never see it and another way to think of it is that it id no worse than many a thing NAD would do in production. Its fine
")
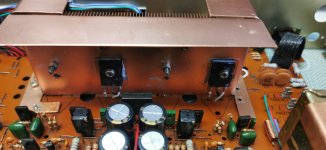
so im getting close to do some of the final bits now
ive replaced the old composite resitors with film types
ive also altered the regulated supply transitors so they are not near the caps(as @Vrystaat stated the caps dry out) all of these ar also uprated to 50v so they should last longer
as you can see in the 2 comparative photos
ive replaced the old composite resitors with film types
ive also altered the regulated supply transitors so they are not near the caps(as @Vrystaat stated the caps dry out) all of these ar also uprated to 50v so they should last longer
as you can see in the 2 comparative photos


![IMG_20240519_115534[1].jpg](/community/data/attachments/1219/1219871-57577a3cef7f1021923272560fc4df7b.jpg)
