Hi Community,
following the steps described in this thread by @mauricioabboud (kudos man!) I confirm I've been able to successfully replace the laser diode in Pioneer PWY1011 using a Sony SLD105VL. The PWY1011 is used on many different Pioneer players commercialised between 1989 and 1992 and this replacement is also likely to work on PWY1006 and PWY1004.
This procedure is not as complex as the Sony KSS laser replacement that @ManoloMos masterfully performed and requires, at latest:
Assuming the PWY1011 has been already removed from the player, these are my LD replacement steps:
1. Check the power trimmer and adjust it to the maximum resistance

2. Shortcut the pads on the laser head flex near the trimmer
3. Desolder the 4 pads responsible for linear motor and linear sensor

4. Remove spindle motor and detach the laser head from the rest of the mechanism
5. Loosen the flex around the LD
5. Desolder the 3 pads of the LD

6. Unscrew the metal plate holding the LD

7. Remove the LD and clean up the flex pads removing welding paste residues
8. Insert the new LD paying attention to orientation
9. Reposition the metal plate

10. Reposition the flex and solder the pads
11. Remount the laser head and the spindle motor on the mechanism
12. Re-solder the 4 pads responsible for linear motor and linear sensor
13. Check all connections between the flex connector and the different pads that have been soldered
14. Reposition the PWY1011 assy in the player
15. Reconnect ground screw
16. Reconnect spindle connector
17. Reconnect the flex connector
18. Remove the shortcut added on step 2
19. Check the LD (even with the trimmer set at maximum resistance the light is visible)
After the physical replacement has been accomplished and the LD has been proved to work, execute the adjustment as described in the Service manual.
A few hints when executing the adjustments:
Although the replacement procedure opens the door for resurrecting many Pioneer players (I'll try more in the next weeks and I'll also try using Rohm) I still need to fix, in this first exercise, an annoying issue due the the linear motor/sensor constantly fluctuating and causing tracking issues on other tracks (any hint/clue/suggestion is more than welcome)
Enjoy and have fun!
following the steps described in this thread by @mauricioabboud (kudos man!) I confirm I've been able to successfully replace the laser diode in Pioneer PWY1011 using a Sony SLD105VL. The PWY1011 is used on many different Pioneer players commercialised between 1989 and 1992 and this replacement is also likely to work on PWY1006 and PWY1004.
This procedure is not as complex as the Sony KSS laser replacement that @ManoloMos masterfully performed and requires, at latest:
- Laser Diode spare part (Sony SLD105VL)
- Oscilloscope (2 channel, bandwidth >20MHz )
- Multimeter
- Pioneer PD-7* service manual (the calibration procedure described in the different manual are identical)
- 2mm flat-head screwdriver for diffraction grating adjustment
- patience and capacity to deal with frustration
- a few hours (4 - 8) of spare time
Assuming the PWY1011 has been already removed from the player, these are my LD replacement steps:
1. Check the power trimmer and adjust it to the maximum resistance
2. Shortcut the pads on the laser head flex near the trimmer
3. Desolder the 4 pads responsible for linear motor and linear sensor
4. Remove spindle motor and detach the laser head from the rest of the mechanism
5. Loosen the flex around the LD
5. Desolder the 3 pads of the LD
6. Unscrew the metal plate holding the LD
7. Remove the LD and clean up the flex pads removing welding paste residues
8. Insert the new LD paying attention to orientation
9. Reposition the metal plate
10. Reposition the flex and solder the pads
11. Remount the laser head and the spindle motor on the mechanism
12. Re-solder the 4 pads responsible for linear motor and linear sensor
13. Check all connections between the flex connector and the different pads that have been soldered
14. Reposition the PWY1011 assy in the player
15. Reconnect ground screw
16. Reconnect spindle connector
17. Reconnect the flex connector
18. Remove the shortcut added on step 2
19. Check the LD (even with the trimmer set at maximum resistance the light is visible)
After the physical replacement has been accomplished and the LD has been proved to work, execute the adjustment as described in the Service manual.
A few hints when executing the adjustments:
- the nominal values described in the service manual are correct as long as your lens is in the correct position/orientation
- if the target had left its seat, make sure to clean the seat and the lens out of any glue residues and check the lens for scratches
- Diffraction grating adjustment is critical to RF pattern clarity
- Tracking balance must be checked every time the radial or axial tilt is modified.
|
|
|
|
|
|
Although the replacement procedure opens the door for resurrecting many Pioneer players (I'll try more in the next weeks and I'll also try using Rohm) I still need to fix, in this first exercise, an annoying issue due the the linear motor/sensor constantly fluctuating and causing tracking issues on other tracks (any hint/clue/suggestion is more than welcome)
Enjoy and have fun!
Yeahhhh!! Another resurrection in the land of Lord,
It is reconfortable to know that my exploration encorauged you. My labor with the humans it´s done, .
.
Your detailed steps are exactly the same that I did. Excellent ilustration and descriptions.
During the adjustements, Was neccesary to recalibrate the grating trim?.
Regarding to seesawing of carriage, it´s normal in this OPU. In your case maybe overshooted. Try to adjusting tracking gain and/or grating trim. It´s occur because the tracking coil on lens arm has a very short run to compensate the deviations, phisically conditionated for the pivto arm design and the rubber suspension of him. I hate this solution.
Hugs my friend.
It is reconfortable to know that my exploration encorauged you. My labor with the humans it´s done,
.Your detailed steps are exactly the same that I did. Excellent ilustration and descriptions.
During the adjustements, Was neccesary to recalibrate the grating trim?.
Regarding to seesawing of carriage, it´s normal in this OPU. In your case maybe overshooted. Try to adjusting tracking gain and/or grating trim. It´s occur because the tracking coil on lens arm has a very short run to compensate the deviations, phisically conditionated for the pivto arm design and the rubber suspension of him. I hate this solution.
Hugs my friend.
AliexpressWhere are you buying your Sony SLD105VL from please?
P.
Absolutely yes. This was the most interesting part of allDuring the adjustements, Was neccesary to recalibrate the grating trim?.
I've also executed the gain calibration for Tracking and Focus, but while the former came with a very clean picture, the latter (the Focus Gain) came up with a very noisy one
|
|
|
| Focus gain calibration | Tracking gain calibration |
Well I'm not 100% sure because there are cases on the same track for the same disc where the seesawing doesn't take place and the track reading is stable for the whole track duration. I agree there's something odd happening on the diffraction grating adjustment, and I wonder if also diffraction grating can wear out - or can get damaged - after yearsRegarding to seesawing of carriage, it´s normal in this OPU. In your case maybe overshooted. Try to adjusting tracking gain and/or grating trim. It´s occur because the tracking coil on lens arm has a very short run to compensate the deviations, phisically conditionated for the pivto arm design and the rubber suspension of him. I hate this solution.
It´s a possibility the wear out over the diffraction glass, but seeing your pictures, the conservation of player has been carefully. I´ll start tuning the servo loops.Well I'm not 100% sure because there are cases on the same track for the same disc where the seesawing doesn't take place and the track reading is stable for the whole track duration. I agree there's something odd happening on the diffraction grating adjustment, and I wonder if also diffraction grating can wear out - or can get damaged - after years
Tracking servo loop are one of the most complex and clever solutions in CD player, applying cascaded closed loops and a lot of control theory. Depending of IC set used (Sony, Toshiba, Philips) some passive components define the PID parameters. For example, the Sony CXA1782 it´s one of my favourities explained datasheets. I suggest you, depending of your schematics, some experimentation over gains and low pass filter over the tracking servo closed loops, more than preset resistors adjust. Some soft modification of capacitors, resistors in this circuits could help you to stabilizate the sleeding movement. The linear motors are more suceptible, by kinetic response, to oscillations.
The random behaviour isn´t strange. A lot of mech variables have influence over the performance and this histeric servo closed loops goes crazy.
By the case try, when the seesawing appears, stop the carriage with your fingers smootly. In some cases the movement dissapear.
Good luck!
Many many thanks Mauricio for the suggestions!
However I need to say that transplanting another PWY1011 the seesawing disappears completely which make me thinking as of a problem related to the motor, the sensor or the magnets (basically parts on the pickup) rather than something on the controlling circuitry.
However I need to say that transplanting another PWY1011 the seesawing disappears completely which make me thinking as of a problem related to the motor, the sensor or the magnets (basically parts on the pickup) rather than something on the controlling circuitry.
Last edited:
This was tested already and I confirm it worked.. but it's a bit unpractical when listening to musicBy the case try, when the seesawing appears, stop the carriage with your fingers smootly. In some cases the movement dissapear.
Could be, but try adding weight to the carriage, a small piece of lead i.e. This will modify the system response and maybe amortiguate the oscillations by mass increase. Try too lubricate with a small drop of very very light oil the pivot axis of lens arm. The black cover must be disassembled for this. If you see the pics in my post easily find it. The objective is modify the "transfer function" of the mechanical assembly.Many many thanks Mauricio for the suggestions!
However I need to say that transplanting another PWY1011 the seesawing disappears completely which make me thinking as of a problem related to the motor, the sensor or the magnets (basically parts on the pickup) rather than something on the controlling circuitry.
It is the phenomenon that occurred when you stoped manually the carriage and the oscillations gone.
Go for it!!.
Hugs
Thanks a lot Mauricio for the hint... you just helped me awaken from my mechanical torpor. The problem was not the mass, not the "spring" but rather the damping element. In my reach for the perfect restoration, I wrongly cleaned up the cylindrical bar and added on the bushings a few micro drop of super fine oil. This was way too frictionless causing the system to go wild.
This morning I re-cleaned the bar and the bushing adding a small amount of PTFE grease and voilà the magic happened with the transfer function being now "proper".
The tracking system works like a charm, tracks are reached in 2 secs, and the seesawing is totally gone!

Cheers, Riccardo
This morning I re-cleaned the bar and the bushing adding a small amount of PTFE grease and voilà the magic happened with the transfer function being now "proper".
The tracking system works like a charm, tracks are reached in 2 secs, and the seesawing is totally gone!
Cheers, Riccardo
Dear Riccardo, ......the damper!!. Brilliant my friend.
And thanks to you for make me back to roots: mass/spring/damper, the dynamic modelization of any mechanical system.
In this days, with all the people recapping boards, intrducing mods, changing diodes (?), using exotic welding methods, paying 1000´s of EU for cables, the basic electromechanical remains intact, and and it laugh out loud of them (and of me).
Excellet job
Hi guys!
I opened the site and found your discussions.
Have fun with lasers.
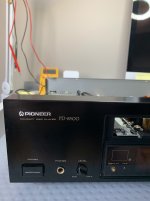
You did a great job, which made me dig out my dust-covered Pioneer PD-8500.
The laser was dead for a long time, but today it is resurrected.
The diode itself was replaced with a new one, your discussion and photos and videos helped.
I set up the mechanics, all that remains is the electronics.
When I'm finished, I'll post my work.
Good luck guys.
I opened the site and found your discussions.
Have fun with lasers.
You did a great job, which made me dig out my dust-covered Pioneer PD-8500.
The laser was dead for a long time, but today it is resurrected.
The diode itself was replaced with a new one, your discussion and photos and videos helped.
I set up the mechanics, all that remains is the electronics.
When I'm finished, I'll post my work.
Good luck guys.
Attachments


Thanks guys.
I stopped, there is no remote control.
It was not possible to go further, since working with electronics in test mode is not possible without a remote control.
Many commands via the remote control to launch the laser.
I ordered the remote control, I will wait and return in a week.
But even now, approximate adjustment of the laser horizontally and vertically brought results.
Now it confidently reads discs and there is a rare failure when playing 15 discs 1.2 failure.
I made a test disc from a standard 12 cm x 8 cm CD.
I glued it with tape to a wooden plane, took a screwdriver and an 80 mm wood cutter. I installed a 120 mm (CD) disk in the center and went through it with the cutter at low speeds. I received a recorded disk for testing and the CD Pioneer tincture.
Something like this.
Thank you for asking.
Good luck to all.
Attachments

Hi @Uladz thanks for the update.
A few things:
Cheers, Riccardo
A few things:
- remote is not needed since you can use hands to move the pickup in the middle of the disc. The other operation, like servo lock, spindle lock and play mode can be controlled with the buttons on the player
- although radial and tangential calibration can be done with a 12 cm disc I recommend checking on eBay for 3" or 8cm discs. The approach you've tried can create scratches on the disc surface plus can generate unbalanced discs that could make the adjustments even harder (long story short buy a used 3" CD on eBay)
Cheers, Riccardo
Interesting thread. I have a some questions, but I'll do questions one by one. This questions are concerned about remove the laser diode in Pioneer laser pickups.
One time I tried to remove a diode laser from a Pioneer laser diode and it was almost impossible.
Did you find any great problem to remove the laser diode, to remove its glue? Did you heat the laser diode for to soften up the glue?
Maybe there are Pioneer laser diodes with different glue.
One time I tried to remove a diode laser from a Pioneer laser diode and it was almost impossible.
Did you find any great problem to remove the laser diode, to remove its glue? Did you heat the laser diode for to soften up the glue?
Maybe there are Pioneer laser diodes with different glue.
Hello Riccardo!
Hi all !
Thanks for the advice.
I haven't worked much with lasers.
Usually a replacement and that's it.
It got interesting here and decided to dig around with replacing the diode and full adjustment.
According to the manual, you need a remote control for commands.
I ordered it.
I'll try to do as you advise.
The most important thing is that it reads and the glitch when playing is gone.
We say that tuning is done by smell.
And it reads all discs, both photo-recorded and original (studio)
I work with vintage amplifiers and decided to work with a CD player.
There are no specialists left in this field in our country.
I will study, since many people cannot service such equipment and it lies.
Original laser - cosmic price for Pioneer.
Once the remote control is ready, I’ll post photos and videos of the SD settings.
With respect to all visitors to the site, Vladislav!
Hello again Riccardo!
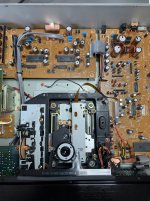
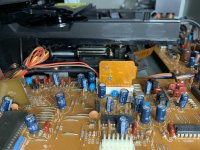
One more thing, this Pioneer PD-8500 model does not have adjustment resistors on the board like the PD-9300, PD-91 and others.
Which are needed for focus, tracking, etc.....
In test mode, adjustment using an oscilloscope and after fine adjustment in the X-Y planes, we mechanically exit the test mode.
We reboot the SD and then the electronics do everything.
After this you can't configure anything else.
This is such a tricky player.
Attached a photo of the boards.
Best regards, Vladislav
Attachments


- Home
- Source & Line
- Digital Source
- Replacing Laser Diode in PWY1011 (Pioneer PD-717, PD-737, PD-7100, PD-7300, PD-8500, PD-9500, PD-71, PD-73, PD-2000LTD)