Sadly, no - 3-jaw, only have a collet chuck for the milling head.
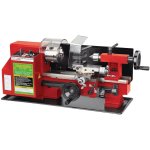
I've got this small machine, and after considering the diameter, it should do the trick. Also just remembered I have another jaw set for the 3-jaw chuck that might go down this small.

Are you using carbide tools? Are you using a parting tool after turning down the inserted section, or just sawing off?
Haven't popped the thrust pad out yet to get dimensions.
I've got this small machine, and after considering the diameter, it should do the trick. Also just remembered I have another jaw set for the 3-jaw chuck that might go down this small.

Are you using carbide tools? Are you using a parting tool after turning down the inserted section, or just sawing off?
Haven't popped the thrust pad out yet to get dimensions.
Firstly I didn't say replacing the caps was unnecessary I have been repairing and testing electronics for a living for over 40years including doing my apprenticeship with Marantz. So any advice I give is based on decades of experience. I have seen more than a few times on forums where someone has blanket replaced caps and the unit no longer works afterwards.
You can machine the thrust pads with a larger lathe. I use a collet chuck. I also made an aluminium fixture to hold the pad to make machining it easier. The fixture can also be held in a 3 or 4 jaw chuck, it's kind of like a 5C emergency collet but straight not tapered.
I thought it useful to report, since there was some input made earlier that it was unnecessary.
My SP10 still has all of the original caps in the TT including the motor drive C2,C4 & C6. Although I do replace these for people who bring me an SP10 for service. Visually inspect everything and replace parts that have signs of failure. The caps in the TT fail because the PS was never serviced which can apply significant ripple to the voltage rails in the TT which these small caps were not designed to take. Tel tail signs are bulging tops and/or signs of leaking.
Hope this helps..
You can machine the thrust pads with a larger lathe. I use a collet chuck. I also made an aluminium fixture to hold the pad to make machining it easier. The fixture can also be held in a 3 or 4 jaw chuck, it's kind of like a 5C emergency collet but straight not tapered.
Well, perhaps not, but...Firstly I didn't say replacing the caps was unnecessary
So I explained my reasoning and my test equipment and procedures. Those bad caps would have gone undiscovered if I had not removed all of them. I also provided some data on the condition of the original caps. I also thanked you for your input, and do agree that many times, folks on forums with little experience do more harm than good when "re-capping".I would not go blanket replacing caps in the TT this is something that has been advocated by people on forums with no formal electronic qualifications. NO professional electronics tech would advise this course of action. I would replace all of the electro caps in the PS except maybe the large chassis mount, I've only replaced this large cap once when someone else replaced it and didn't do a good job which subsequently caused the SP10 to fail.
My SP10 still has all of the original caps in the TT including the motor drive C2,C4 & C6.
Hopefully, my subsequent posts and photos indicate some ability to you, and though I am not a professional, I started soldering about 55 years ago, and have now built and repaired a lot of electronics/audio/guitar gear.
I don't have collet chucks in either lathe, but am intrigued by your aluminum fixture, so will give that some more thought and attention.
Thank you, Warrjon. I still do appreciate your comments and input.
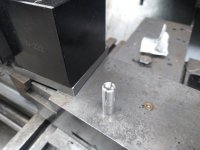
This is the fixture I made to machine the pads. It's 10mm aluminium round bar. You could easily make it from larger OD stock to fit your chuck. The pad does not need to perfectly concentric so long as the pad doesn't touch the journal sleeve. The important part is the fit of the pad on the bottom of the journal. This needs to be a positive clip fit and the bottom of the pocket needs to engage on the bottom of the journal.
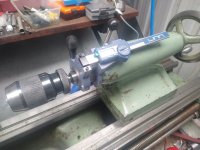
The ID is 6.8mm and 2.5mm deep. I use 8mm OD bar machined to 6.7mm then cut the pad at 3mm length. Place the pad in the fixture and clip one side which becomes the bottom flip it over and machine the pocket. The depth of the fixture is what I use to govern the depth of the pad so repeatability is better than 0.1mm. I use a 4mm slot drill to pocket the hole then a small PCD boring bar to finish. A digital depth gauge on the tailstock makes drilling the pocket easier.


The ID is 6.8mm and 2.5mm deep. I use 8mm OD bar machined to 6.7mm then cut the pad at 3mm length. Place the pad in the fixture and clip one side which becomes the bottom flip it over and machine the pocket. The depth of the fixture is what I use to govern the depth of the pad so repeatability is better than 0.1mm. I use a 4mm slot drill to pocket the hole then a small PCD boring bar to finish. A digital depth gauge on the tailstock makes drilling the pocket easier.


Last edited: