I thought I would post my experience building Troels Gravesen’s Ekta-7741 speakers and hopefully provide learnings that might prove helpful to other DIYers.
The hardest part was choosing which TG speaker kit to build since there are many options but little understanding of how they sound. I’ve been looking at TG’s website for a number of years now, mostly for inspiration. The only decision criteria I could come up with was to review the kit drivers selection for design intent and chat with people who have built the speakers I’m interested in.
The two finalists were the Revelator-851 and Ekta-7741. On paper, they both improve on what my Sonus Faber Auditor M’s do. Two people who have built several TG designs, including the 851’s, recommended the 851’s. A third person recommended the Ekta-7741 over the Etka MarkII having built both. For me, it came down to a choice between the deeper bass of the 851’s versus the promise of improved midrange clarity and directivity of the 7741. Having heard neither, I chose the 7741 which also happens to have a simpler crossover topology.
http://www.troelsgravesen.dk/Ekta-7741.htm
Others in my position would have just bought a couple subwoofers to go with my SF’s for a little less money and a lot less effort and called it good. That notion crossed my mind but that’s not me. If you’re reading this, it’s probably not you either.
I’m not sure these types of projects are full-on DIY since the engineering has all been done by someone else. I consider this more of a shop project. I build a lot of furniture and have a fairly complete woodworking shop although not a lot of space. The only tools I bought for this project have been a small circle compass for routing the driver holes and some special router bits.
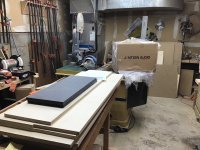
Here is what I have so far.
The hardest part was choosing which TG speaker kit to build since there are many options but little understanding of how they sound. I’ve been looking at TG’s website for a number of years now, mostly for inspiration. The only decision criteria I could come up with was to review the kit drivers selection for design intent and chat with people who have built the speakers I’m interested in.
The two finalists were the Revelator-851 and Ekta-7741. On paper, they both improve on what my Sonus Faber Auditor M’s do. Two people who have built several TG designs, including the 851’s, recommended the 851’s. A third person recommended the Ekta-7741 over the Etka MarkII having built both. For me, it came down to a choice between the deeper bass of the 851’s versus the promise of improved midrange clarity and directivity of the 7741. Having heard neither, I chose the 7741 which also happens to have a simpler crossover topology.
http://www.troelsgravesen.dk/Ekta-7741.htm
Others in my position would have just bought a couple subwoofers to go with my SF’s for a little less money and a lot less effort and called it good. That notion crossed my mind but that’s not me. If you’re reading this, it’s probably not you either.
I’m not sure these types of projects are full-on DIY since the engineering has all been done by someone else. I consider this more of a shop project. I build a lot of furniture and have a fairly complete woodworking shop although not a lot of space. The only tools I bought for this project have been a small circle compass for routing the driver holes and some special router bits.
Here is what I have so far.
Attachments
Last edited:

Nice project, I think this could be a real gem. Drivers are absolute and if Troels did a good crossover, and it seems that he did, you could be very surprised.
I did his MTM16 with Satori drivers and it sounds really amazing. Music is disconnected from the box with very nice and deep soundstage.
Two illuminator bass drivers and 3 way should do even more in all aspects.
How big is the room and what is the amplification?

I did his MTM16 with Satori drivers and it sounds really amazing. Music is disconnected from the box with very nice and deep soundstage.
Two illuminator bass drivers and 3 way should do even more in all aspects.
How big is the room and what is the amplification?
@Sasha KC83: You did a very nice job with the MTM16's - I would love to hear them. My room, a combined living & dining space, is 19' x 22' and is part of an open floor plan. The ceiling is vaulted so the total volume is quite large. Amplification is by a Classe' Audio Seventy - nominally 75W into 8Ohms and 150W into 4Ohms. (The 75W is actually a derated value in order to achieve the mythical doubling into 4Ohms.)
@jccart: I got the Milescraft small circle compass. Originally I bought a Jasper but it didn't fit my model of Bosch router. I think in the end this is better choice because the Milescraft uses a continuous setting allowing for tolerance adjustments while the Jasper uses discrete settings.
@jccart: I got the Milescraft small circle compass. Originally I bought a Jasper but it didn't fit my model of Bosch router. I think in the end this is better choice because the Milescraft uses a continuous setting allowing for tolerance adjustments while the Jasper uses discrete settings.
@Stefan7751: No problem with more detailed questions in a PM. I'm going to be at this awhile so the delay is not important, if you are interested in how they sound.
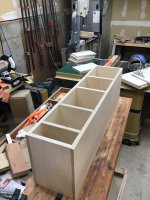
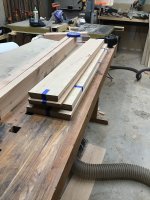
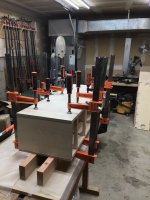
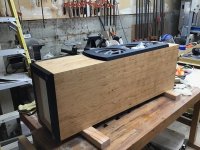
Update: The raw cabinets are just about done. I'm adjusting the baffle glue surface of the cabinets to make sure it's a good fit. Later today I'm heading over to the lumber store to get some 8/4" cherry for shop cut veneer. The baltic birch plywood that I'm using does not have a "good" face so it needs to be veneered. I would rather go that route instead of mitering angles. Troels Gavensen is an excellent cabinet maker and makes that part look easy. It's not.
Update: The raw cabinets are just about done. I'm adjusting the baffle glue surface of the cabinets to make sure it's a good fit. Later today I'm heading over to the lumber store to get some 8/4" cherry for shop cut veneer. The baltic birch plywood that I'm using does not have a "good" face so it needs to be veneered. I would rather go that route instead of mitering angles. Troels Gavensen is an excellent cabinet maker and makes that part look easy. It's not.
I had the same question. Also read a lot of reviews on Ekta mk2, and my main question is : what is the best upgrade for Ekta mk2 - Ekta 7741 or Ekta mk2 plus 10" sub http://www.troelsgravesen.dk/26W-4558T00.htmAlways wondered about the sound difference between the 7741 and the 7751.
Ok, thanks,
this is what Troels says : Adding my 26W subwoofers, makes these speakers almost similar to my reference, although it cannot cope with the 10" upper bass of the ATS4-HE. Size matters as always. Maybe my next build.
this is what Troels says : Adding my 26W subwoofers, makes these speakers almost similar to my reference, although it cannot cope with the 10" upper bass of the ATS4-HE. Size matters as always. Maybe my next build.
Update
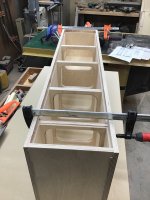
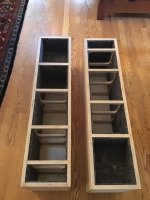
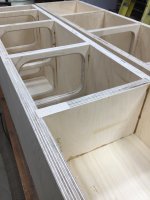
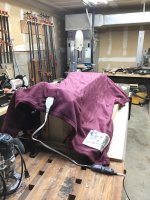
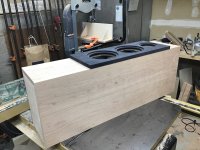
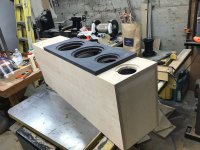
- Glued sides, back and braces. Used a heating blanket to keep glue above 50F in order to cure
- Leveled out a few braces to ensure seal in mid-cabinet.
- Lined cabinets with wool felt
- Shop cut veneer 1/8" thick (cherry)
- Inner front baffle veneered and driver holes routed in both inner and outer baffle.
- Lots of little problems, no major set backs.
Attachments
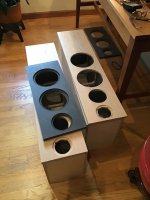
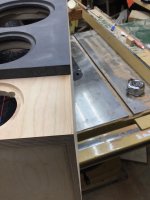
Installed the crossovers, getting the veneer glued on and coming to terms with one major disappointment. I took my shop cut veneer to a commercial woodworking place to get it sanded to thickness since I had difficulty running it through my planer. In running it through their drum sander, they feathered the edges of the veneer. I only had 1/4" of overhang waste at the most to work with so I was unable to get all the taper out. That resulted in a visible glue line on the edge.
I knew this was going to be a problem. I had to decide whether to scrap the material, eat the cost of shop time and do it over again or use as is. I decided to not let perfect be the enemy of good and use as is. These projects always start out as perfect in your mind then through attrition you end up with something between your ideal and what you can live with.
Looking forward to how they sound.
Attachments
- Home
- Loudspeakers
- Multi-Way
- Troels Gravesen Ekta-7741 Speaker Build