• These commercial threads are for private transactions. diyAudio.com provides these forums for the convenience of our members, but makes no warranty nor assumes any responsibility. We do not vet any members, use of this facility is at your own risk. Customers can post any issues in those threads as long as it is done in a civil manner. All diyAudio rules about conduct apply and will be enforced.

XSD Speaker Flatpack GB

Member
Joined 2003
Paid Member
This may be more trouble than it's worth, but I could install screw in wings, using machine type screws, not wood screws, fill and sand on exposed side. Drill hole through strip, use washer and nut on the inside. Will have to think on that.

Russellc
 
Member
Joined 2003
Paid Member
About ready to add wings, going over all the edges with filler and sanding smooth. Screws to mount the drivers should arrive from parts Express today. Looking at the woofer wiring. Don't want to mess this up!

Nice to at least have them standing up like speakers!

Back to drilling heat sinks for the XA 252. Just read about a member here using it on a pair of Theil speakers very well. They apparently go very low in resistance, 2 ohms or so, average 5.

Russellc
 
Member
Joined 2006
hoping that you are taking pictures and plan to post them, my mind can only conjure up a hazy likeness ;) . I have the XA252 enroute too - looking forward to your report of the pairing with XSD..dB
 
  • Like
Reactions: 1 users
Member
Joined 2003
Paid Member
I have one speaker full of woofers, 4 in the other one. This is just drilling and driver fitting. It will all be undone, bass unit drilled for wiring, final fill and sand. First paint followed by fine sanding. This will be a satin finish not a gloss. Then the feet will be mounted.

Then reassembled. Yeah I'm not fooling myself. I will trash wire them for a listen!

I also have all the stripping in place that the wings screw into, and the wing's guide holes drilled through. Also got the tweeter mount hole drilled in faceplate.

Need to go to hardware store and get appropriate screws to match threads in wave guide. Mount tweeter in waveguide and mount that assembly on front panel. Need some nice screws to attach wings to the stripping.

Bubba
 
  • Like
Reactions: 1 user
Founder of XSA-Labs
Joined 2012
Paid Member
Hey nice work, Bubba!

Sorry, but I think I forgot to include the M3 x 5mm buttonhead screws for mounting the tweeter to the waveguide - if you have to go and buy them. I can send you some if still needed.
 
  • Like
Reactions: 1 user
Member
Joined 2003
Paid Member
Sweet! I didn't want to put anything that didn't look like it belonged. So the threaded holes in the wave guide fit M3 x 5mm? Thanks, but I can pick those up. I need to get the screws that then mount waveguide/tweeter assembly to the front panel anyway

Russellc
 
Member
Joined 2003
Paid Member
hoping that you are taking pictures and plan to post them, my mind can only conjure up a hazy likeness ;) . I have the XA252 enroute too - looking forward to your report of the pairing with XSD..dB
I still need to drill the heatsinks for the big mosfet pucks. While heatsinks are off.I need to drill for feet and large transformer. Once boards are mounted, this will go much faster!
 
Founder of XSA-Labs
Joined 2012
Paid Member
  • Like
Reactions: 1 user
Member
Joined 2003
Paid Member
Thanks, on the way. Now to figure out what I want to wire
Hey nice work, Bubba!

Sorry, but I think I forgot to include the M3 x 5mm buttonhead screws for mounting the tweeter to the waveguide - if you have to go and buy them. I can send you some if still needed.
actually I am Russellc, I am bubba on another forum!

Russellc
 
Member
Joined 2003
Paid Member
A thing or two with assembly.

I suggest buying a couple extra woofers. Have mine all fixed with the vibration killing stuff and all installed, but I put a Phillips head screwdriver through the surround on two of them. Fortunately I had 4 extra...

.. particularly vexing after taking time to stick the anti vibration stuff to.

The other thing is the peel back gasket for the tweeter/Waveguide. The short button head screw isn't quite long enough to engage the threads. There are s few small bolts holding tweeter together that press against the pad. I cut on the gasket to give clearance, and the screws were just long enough.

Bubba
 
Last edited:
Founder of XSA-Labs
Joined 2012
Paid Member
Do not use their gasket. It’s too thick and besides, bumps against all the screw heads. Just apply a thin bead of silicone RTV sealant if you wish but, really - for an open baffle application no sealant needed. More for use in a box speaker like a bass reflex or sealed to prevent air from woofer leaking through.

 
Member
Joined 2003
Paid Member
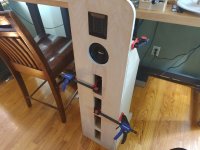
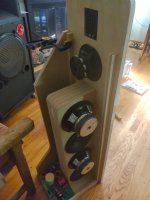
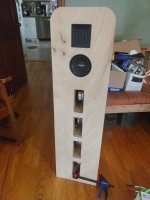
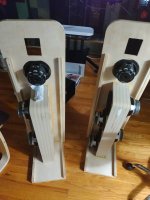
Oh well, they installed with cuts I made, I guess it matters not, so that's good! And a few pics:


Russellc
 

Attachments

  • IMG_20230924_161708715.jpg
    IMG_20230924_161708715.jpg
    501.9 KB · Views: 88
  • IMG_20230924_161728418.jpg
    IMG_20230924_161728418.jpg
    418.4 KB · Views: 112
  • IMG_20230924_161720181.jpg
    IMG_20230924_161720181.jpg
    476.8 KB · Views: 99
  • IMG_20230919_183522906.jpg
    IMG_20230919_183522906.jpg
    460.7 KB · Views: 87
  • Like
Reactions: 1 user
Founder of XSA-Labs
Joined 2012
Paid Member
Very nice progress!

Tweeter waveguide to baffle:
#6 Philips or hex drive button head wood screws in black oxide. I used the #6 x 0.75in black panhead from Parts Express.

For the wings, I use square drive #6 x 1.5in long wood screws. #8 also works.

1695751207390.jpeg
 
  • Like
Reactions: 1 user
Top