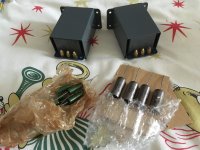
Did you decide where you were starting? control unit or amp?
Did you have EF86's and KT66's by the way? Or have you bought new?
Did you have EF86's and KT66's by the way? Or have you bought new?
I will start with the QII's, then continue with the 22. Will have a lot of time for this!
I've just ordered smoothing caps for the II's from Keith Snook. He makes authentic looking smoothing cans. My plan is to fire it up with those, and send the original to a friend to see if it could be reformed
I've just ordered smoothing caps for the II's from Keith Snook. He makes authentic looking smoothing cans. My plan is to fire it up with those, and send the original to a friend to see if it could be reformed
I cleaned the QII's thoroughtly with a brush and a vacuum cleaner in and outside, and carefully washed off the tubes with a soapy watered cloth, just not to unintentionally wash of the factory marking on those. They shaked off years of dust a grime.
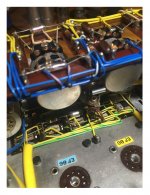
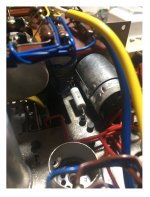
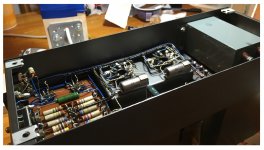
Here are the internals:
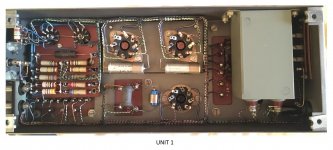
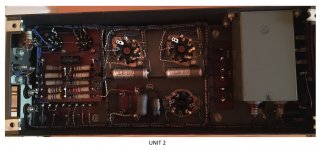
With the Quad 22's, I managed to swap all the capacitors at the bottom of the unit, and 3 caps at the top.
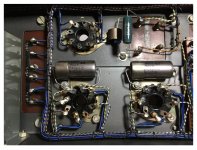
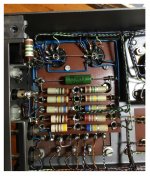
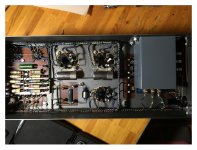
Here, you can find before/after photos:
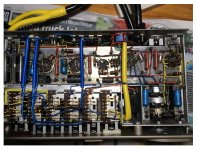
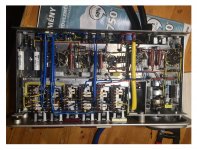
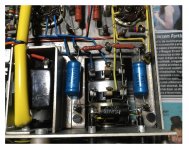
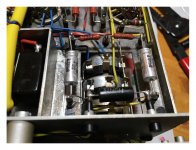
Managed to take off the top board, but access to that little cap at the top of the switchboard was a pain, but not even less the other side of the volume pot (the 0.1uF cap).
I accidentally burned some cables, and maybe applied a bit too much heat to the Styroflex and to the switcher's lugs but I hope they are all right...
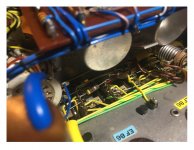
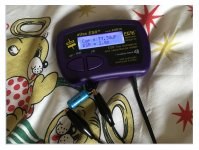
And, here is a measurement of the C10 cap:
Here are the internals:


With the Quad 22's, I managed to swap all the capacitors at the bottom of the unit, and 3 caps at the top.
Here, you can find before/after photos:


Managed to take off the top board, but access to that little cap at the top of the switchboard was a pain, but not even less the other side of the volume pot (the 0.1uF cap).
I accidentally burned some cables, and maybe applied a bit too much heat to the Styroflex and to the switcher's lugs but I hope they are all right...


And, here is a measurement of the C10 cap:

Last edited:
Also, here is the measured values of the resistors. They are measured cold, in situ (in circuit) and with a UT33-D DVM
First, at the bottom of the 22's:
R30 - 54,2 kOhm
R31 - 58,8 kOhm
R28 - 1012 Ohm
R29 - 981 Ohm
R26 - 1,56MOhm
R27 - 1,67MOhm
R32 - 17,96kOhm
R25 - 29,4kOhm
R20 - 52,5kOhm
R14 - 2,88kOhm
R15 - 2,93kOhm
R12 - 1,68MOhm
R13 - 1,67MOhm
R18 - 1,68MOhm
R19 - 1,57MOhm
First, at the bottom of the 22's:
R30 - 54,2 kOhm
R31 - 58,8 kOhm
R28 - 1012 Ohm
R29 - 981 Ohm
R26 - 1,56MOhm
R27 - 1,67MOhm
R32 - 17,96kOhm
R25 - 29,4kOhm
R20 - 52,5kOhm
R14 - 2,88kOhm
R15 - 2,93kOhm
R12 - 1,68MOhm
R13 - 1,67MOhm
R18 - 1,68MOhm
R19 - 1,57MOhm
Last edited:
...and the top of the 22's
R42 - 35,7 kOhm
R44 - 34,2 kOhm
R34 - 35,6 kOhm
R36 - 35,3 kOhm
R41 - 27,0 kOhm
R43 - 27,5 kOhm
R33 - 35,6 kOhm
R35 - 38,6 kOhm
R37 - 12,9 kOhm
R38 - 12,3 kOhm
R39 - 330 kOhm
R40 - 340 kOhm
R42 - 35,7 kOhm
R44 - 34,2 kOhm
R34 - 35,6 kOhm
R36 - 35,3 kOhm
R41 - 27,0 kOhm
R43 - 27,5 kOhm
R33 - 35,6 kOhm
R35 - 38,6 kOhm
R37 - 12,9 kOhm
R38 - 12,3 kOhm
R39 - 330 kOhm
R40 - 340 kOhm
Looks great. Really nice work.
Thank you! 🙂 It was really tiring job... Maybe because of all that nerve not to damage it!
Would be an overkill if I order 1% metal film resistors? I assume that the replacements shouldn’t necessarily have 10% tol.?
M
M
They do look very original. Are they close in serial numbers?
I wouldn't bother reforming the smoothing caps if you plan to use the amps for serious listening; there comes a point where pre-emptive maintenance means you can do the job once and forget about it. It could be nice to re-stuff the square can to keep to the original look though. Mine were quite heavily modded before I got to grips with them (picture is the starting point), so it was easier to ignore aesthetics.
I wouldn't bother reforming the smoothing caps if you plan to use the amps for serious listening; there comes a point where pre-emptive maintenance means you can do the job once and forget about it. It could be nice to re-stuff the square can to keep to the original look though. Mine were quite heavily modded before I got to grips with them (picture is the starting point), so it was easier to ignore aesthetics.
Attachments
My personal philosophy is that to be most sympathetic to the restoration you should use the parts that the originals might have used, if they had been available. Quad used good parts, but they were still built to a price point. It’s actually quite hard to find 10% resistors these days, and 1% aren’t significantly more expensive.
Not really, they are about 12.000 apart, but read somewhere, that this isn’t necessarily means anything, as these tags picked randomly by the women of QUAD 🙂
Apart from the writings on the transformers and the c5 cap (that is changed probalbly in the past), they look the same.
Keith Snook makes some authentic replacement smoothers for the QII, and I already ordered from him. He gave a set of caps for stuffing them in the 22s for free, so I will do this next time.
Also, ordered the pot adapter and some new old stock tubes. These were a fortune, but ok…
As for resistors, thank you for your guide. I will get together some 1% metal films (1/2W and 400V) for the 22s.
Meanwhile waiting for parts...
When I bought the 22 from eBay, the seller did not included the mains plug and cable, and found to be difficult to source this so called 'Vintage Bulgin 2 pole P29' plug for the amp. After some time, I had the luck to find one from an italian seller. Needless to say, I bought it immediately! Sold for a moderate price, not that horrible, but one's do not buy plugs for a price tag like this one had....
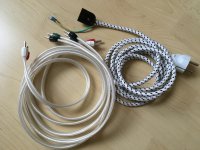
Anyway, the cable arrived today. My luck that the end of the cable was unable to fit into the socket (never saw a termination like this), so I bought a clothing iron's replacement cable, and made these:
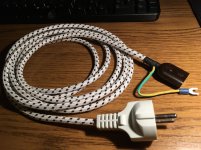
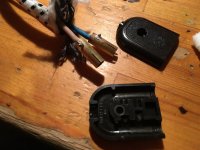
I managed to have the earth lead fly out of the gauge, and terminate it into a fork.
Also, I had some vintage Belling Lee silver plated banana plugs, so made another two cables for connecting the QII's with the ESL's
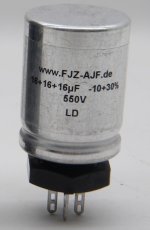
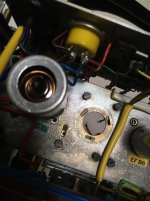
Also, found a little company (Keith Snook helped me), that sells capacitor cans exactly the values for the 22's (16+16+16uF) in a slightly different outfit, so took out the HUNTS pack, and made some calculations, if a 18mm diameter tower could fit in...
It will not easily, anyway, as the hole is only 15,5mm...
When I bought the 22 from eBay, the seller did not included the mains plug and cable, and found to be difficult to source this so called 'Vintage Bulgin 2 pole P29' plug for the amp. After some time, I had the luck to find one from an italian seller. Needless to say, I bought it immediately! Sold for a moderate price, not that horrible, but one's do not buy plugs for a price tag like this one had....
Anyway, the cable arrived today. My luck that the end of the cable was unable to fit into the socket (never saw a termination like this), so I bought a clothing iron's replacement cable, and made these:


I managed to have the earth lead fly out of the gauge, and terminate it into a fork.
Also, I had some vintage Belling Lee silver plated banana plugs, so made another two cables for connecting the QII's with the ESL's

Also, found a little company (Keith Snook helped me), that sells capacitor cans exactly the values for the 22's (16+16+16uF) in a slightly different outfit, so took out the HUNTS pack, and made some calculations, if a 18mm diameter tower could fit in...
It will not easily, anyway, as the hole is only 15,5mm...


There is a discussion of this on Keith's page: ~ QUAD II Amplifier C4 & C6 Replacement PSU Capacitors ~
Sounds like it's OK.
Sounds like it's OK.
You are going to have to fit a glass bottom cover on these amps! ;-)
I thought it was quite useful keeping the real estate freeed up by not having the block capacitor, but if I had had the original block caps, then I think I would have tried to stuff them and see how that panned out.
Now you have started down the path of improvements! Won't be long before you are ditching the rectifier, changing the OPTs, switching to ECC83 driver, and reaching for that purple aerosol paint can ;-)
Thank you for your help!
@OldHector:
I hope I am not already done that, but I do not want to make 'Theseus's ship' out of these.
Simply, I will just sleep better with every old electrolitics are out. If you barn find an old Ferrari, you probably have to swap at least the tires, those deteriorated by this time. Hope, my analogy is correct.
So far I've done with the caps in the two monoblocks. I even managed no to break these beutiful 'tag cards' locking the new blocks.
I like the outcome, ornamentally.
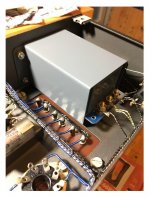
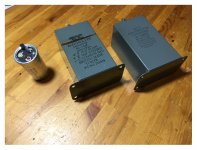
Anyway, having these out of the system, I will try to send them to a friend who's have the apparatus to reform these, or simply just sell them. I got a request from Keith, that he could find them useful.
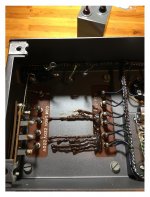
I found some sticky stuff (?) under one capacitor block, that is rather beeswax than tar. I don't know if I had to do anything with this, so I left it in place.
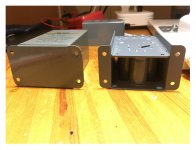
Here is a comparison of the blocks:
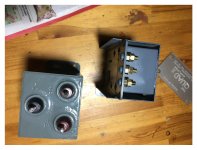
If I have the captower tomorrow for the 22's, and have it somehow fit, I will do an initial test this weekend.
@OldHector:
I hope I am not already done that, but I do not want to make 'Theseus's ship' out of these.
Simply, I will just sleep better with every old electrolitics are out. If you barn find an old Ferrari, you probably have to swap at least the tires, those deteriorated by this time. Hope, my analogy is correct.
So far I've done with the caps in the two monoblocks. I even managed no to break these beutiful 'tag cards' locking the new blocks.
I like the outcome, ornamentally.


Anyway, having these out of the system, I will try to send them to a friend who's have the apparatus to reform these, or simply just sell them. I got a request from Keith, that he could find them useful.

I found some sticky stuff (?) under one capacitor block, that is rather beeswax than tar. I don't know if I had to do anything with this, so I left it in place.

Here is a comparison of the blocks:


If I have the captower tomorrow for the 22's, and have it somehow fit, I will do an initial test this weekend.
Last edited:
- Home
- Amplifiers
- Tubes / Valves
- Finally: The QUAD II and QUAD 22

