

use just one - lower L , mosfet pins are not long enough for doubled thickness
elongating is more important than increased area, per se
so you'll be good
elongating is more important than increased area, per se
so you'll be good
of course , M4 screws of proper quality, split washers
proper quality means either quality mark on them (5.6 enough, 8.8 more than enough) , or buy Stainless Steel ones
everything to avoid mass produced cheese hardness
for that length, 4 groups of 2 screws
easiest to shoot between fins, so you can drill through hole and tap more safely
or use Allen head screws from out (maybe some shaving is needed to squeeze them between fins), nuts inside
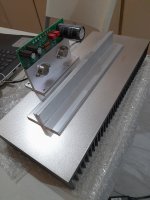
put some thermal goop between L bar and heatsink
proper quality means either quality mark on them (5.6 enough, 8.8 more than enough) , or buy Stainless Steel ones
everything to avoid mass produced cheese hardness
for that length, 4 groups of 2 screws
easiest to shoot between fins, so you can drill through hole and tap more safely
or use Allen head screws from out (maybe some shaving is needed to squeeze them between fins), nuts inside
put some thermal goop between L bar and heatsink
Thanks ZM for advise.
Screws nowadays mostly bad quality specially if you tighten them will easily tear.
Shows many times metals nowadays have been recycled.
I'm also looking at 4 group of 2 stainless screws in between fins.
Like most of your build, I also like to DIY my chassis where possible.
Screws nowadays mostly bad quality specially if you tighten them will easily tear.
Shows many times metals nowadays have been recycled.
I'm also looking at 4 group of 2 stainless screws in between fins.
Like most of your build, I also like to DIY my chassis where possible.
This little jewel come to me.
First BIG Thank You, to all responsible people for this amp, Nelson Pass, DiyAudio crew and Zen Mod.
Without Zen Mod's help this amp would stay in pieces for a long time as my life is in the fifth gear at the moment.
About sound....This amp is sooo pleasure to listen to, so relaxing with all necessary details.
--- Proud owner 🙂
P.S.
Delayed on/off circuit works perfectly.
Attachments


Still on back side of amp
Mean Well switcher PSU is of good quality, but I don't like flimsiness of DC connector, neither male nor female one
Good ole 5-pin XLR is certainly better; I would like Calt Stecker being on cable, Heiss Stecker being on amp, but didn't had Heiss one ....... anyway , I did stay with original topology - Heiss Stecker on cable
superblingy drill and edge reamer, no need to be overly precise, XLR is covering all
I didn't even hop to my vertical drill, done it with hand-accu one
useful tip for soldering pin-equipped connectors - always mary male one with female one - no bending of pins in plastic, due to heat
Would you please point out name of both power Input plugs - chassis and cable
regular 5-pin XLR pair, this one made by Neutrik, I believe
though, even better to use Powercon or Speakon pair
also, there is avalanche of so called Aviation connectors
plenty of choices ..... indulge yourself with choice, if you need to order them
I had these in drawer, lazy to wait to get even more appropriate ones
though, even better to use Powercon or Speakon pair
also, there is avalanche of so called Aviation connectors
plenty of choices ..... indulge yourself with choice, if you need to order them
I had these in drawer, lazy to wait to get even more appropriate ones
Which delayed circuit did you use?Delayed on/off circuit works perfectly.
Isn’t XLR for line level signals only?
if pins and their contact is sufficient for duty I gave them, why should I care for original designation?
Which delayed circuit did you use?
try reading thread from first post ......... I did invest some elbow time to present everything

Hi Zen,Still in mechanical realm, sort of
Again post-Pa dealing gone wrong - Pa did arrange 2 pole switch, while hole on back side is for one pole, one pole in kit;
What's the advantage of modifying your chassis for using a two-pole on/off switch as opposed to a single-pole switch the chassis was designed for?
re-read first post - delay circuit (AntiBigBadaBoom) - as Papa designed it (or as my derivative) is impossible with single pole switch
having small hole and single section switch is result of miscommunication in project Team ..... but we can't blame them, everyone involved is doing it Pro Bono
having small hole and single section switch is result of miscommunication in project Team ..... but we can't blame them, everyone involved is doing it Pro Bono
it seems existing hole dimensions, so yes
though, if you like flimsy components
for my OCD, it's trigger

though, if you like flimsy components
for my OCD, it's trigger
ZM, did you use any loctite or thread fastening compound on the threaded studs, where they enter the heat sink, or on the bolts used to fasten the heat spreader to the heat sink? Any reason not to?solving thermal issues; see pics, pretty much self-explanatory
whoever did arrange with Modushop guys assembly with M3 screws is not having enough mileage with all things mechanical/thermal; not blaming a guy at all, I know that this wasn't operation made by professionals and outcome is still extraordinary
that's exact reason why I'm posting this, to help Greedy Boyz in proper finishing and to feed my own OCD
fact is -these 4pcs of M3 screws needed to be M4 and additional 2pcs of M4 are necessary
only that way , with lapped T Bar, there is enough squeezing force at disposal to get rid of air gap between T Bar and heatsink
The primary purpose here is to help anchor the studs in the heat sink. I'm a little concerned that the M4 threads I tapped are too loose to hold a stud properly, hence I want to try a thread locking compound to hold the studs in place. I still plan to use a star or split washer setup to compress the T-bracket to the sink.feel free to use it, even if there is no reason to use it at all, considering that I insist on using split washer (or any other variation of same) wherever thermal cycling is in case
if tapping is so fluffy, locking compound is not going to help, maybe just hardest - gluing iteration of Loctite
if in doubt, repeat tapping
if nothing else, more holes are allowing more air

if in doubt, repeat tapping
if nothing else, more holes are allowing more air
- Home
- Amplifiers
- Pass Labs
- Lottery DIY Sony VFET pt 2 (N-Channel) - assembly by Mighty ZM