I was wondering about that tooAs long as the cone faces in on one and magnet faces in on opposing driver, you are fine. I did a zig zag for “symmetric” look. The speaker would technically be heavier on left or right if we did not zig zag.
And the reason to have the cone face on one and magnet on the other facing each other is so that the drivers move antiparallel relative to their mechanical construction to cancel out suspension induced harmonic distortion. It also makes the cavity volume smaller, thereby increasing the upper bandwidth.

Hi Plott,
From post 1 is a good layout that seems to work.
Wires are: input from amp is on left, tweeter is on top, midrange out is wire on lower right side, bass is lower left side.
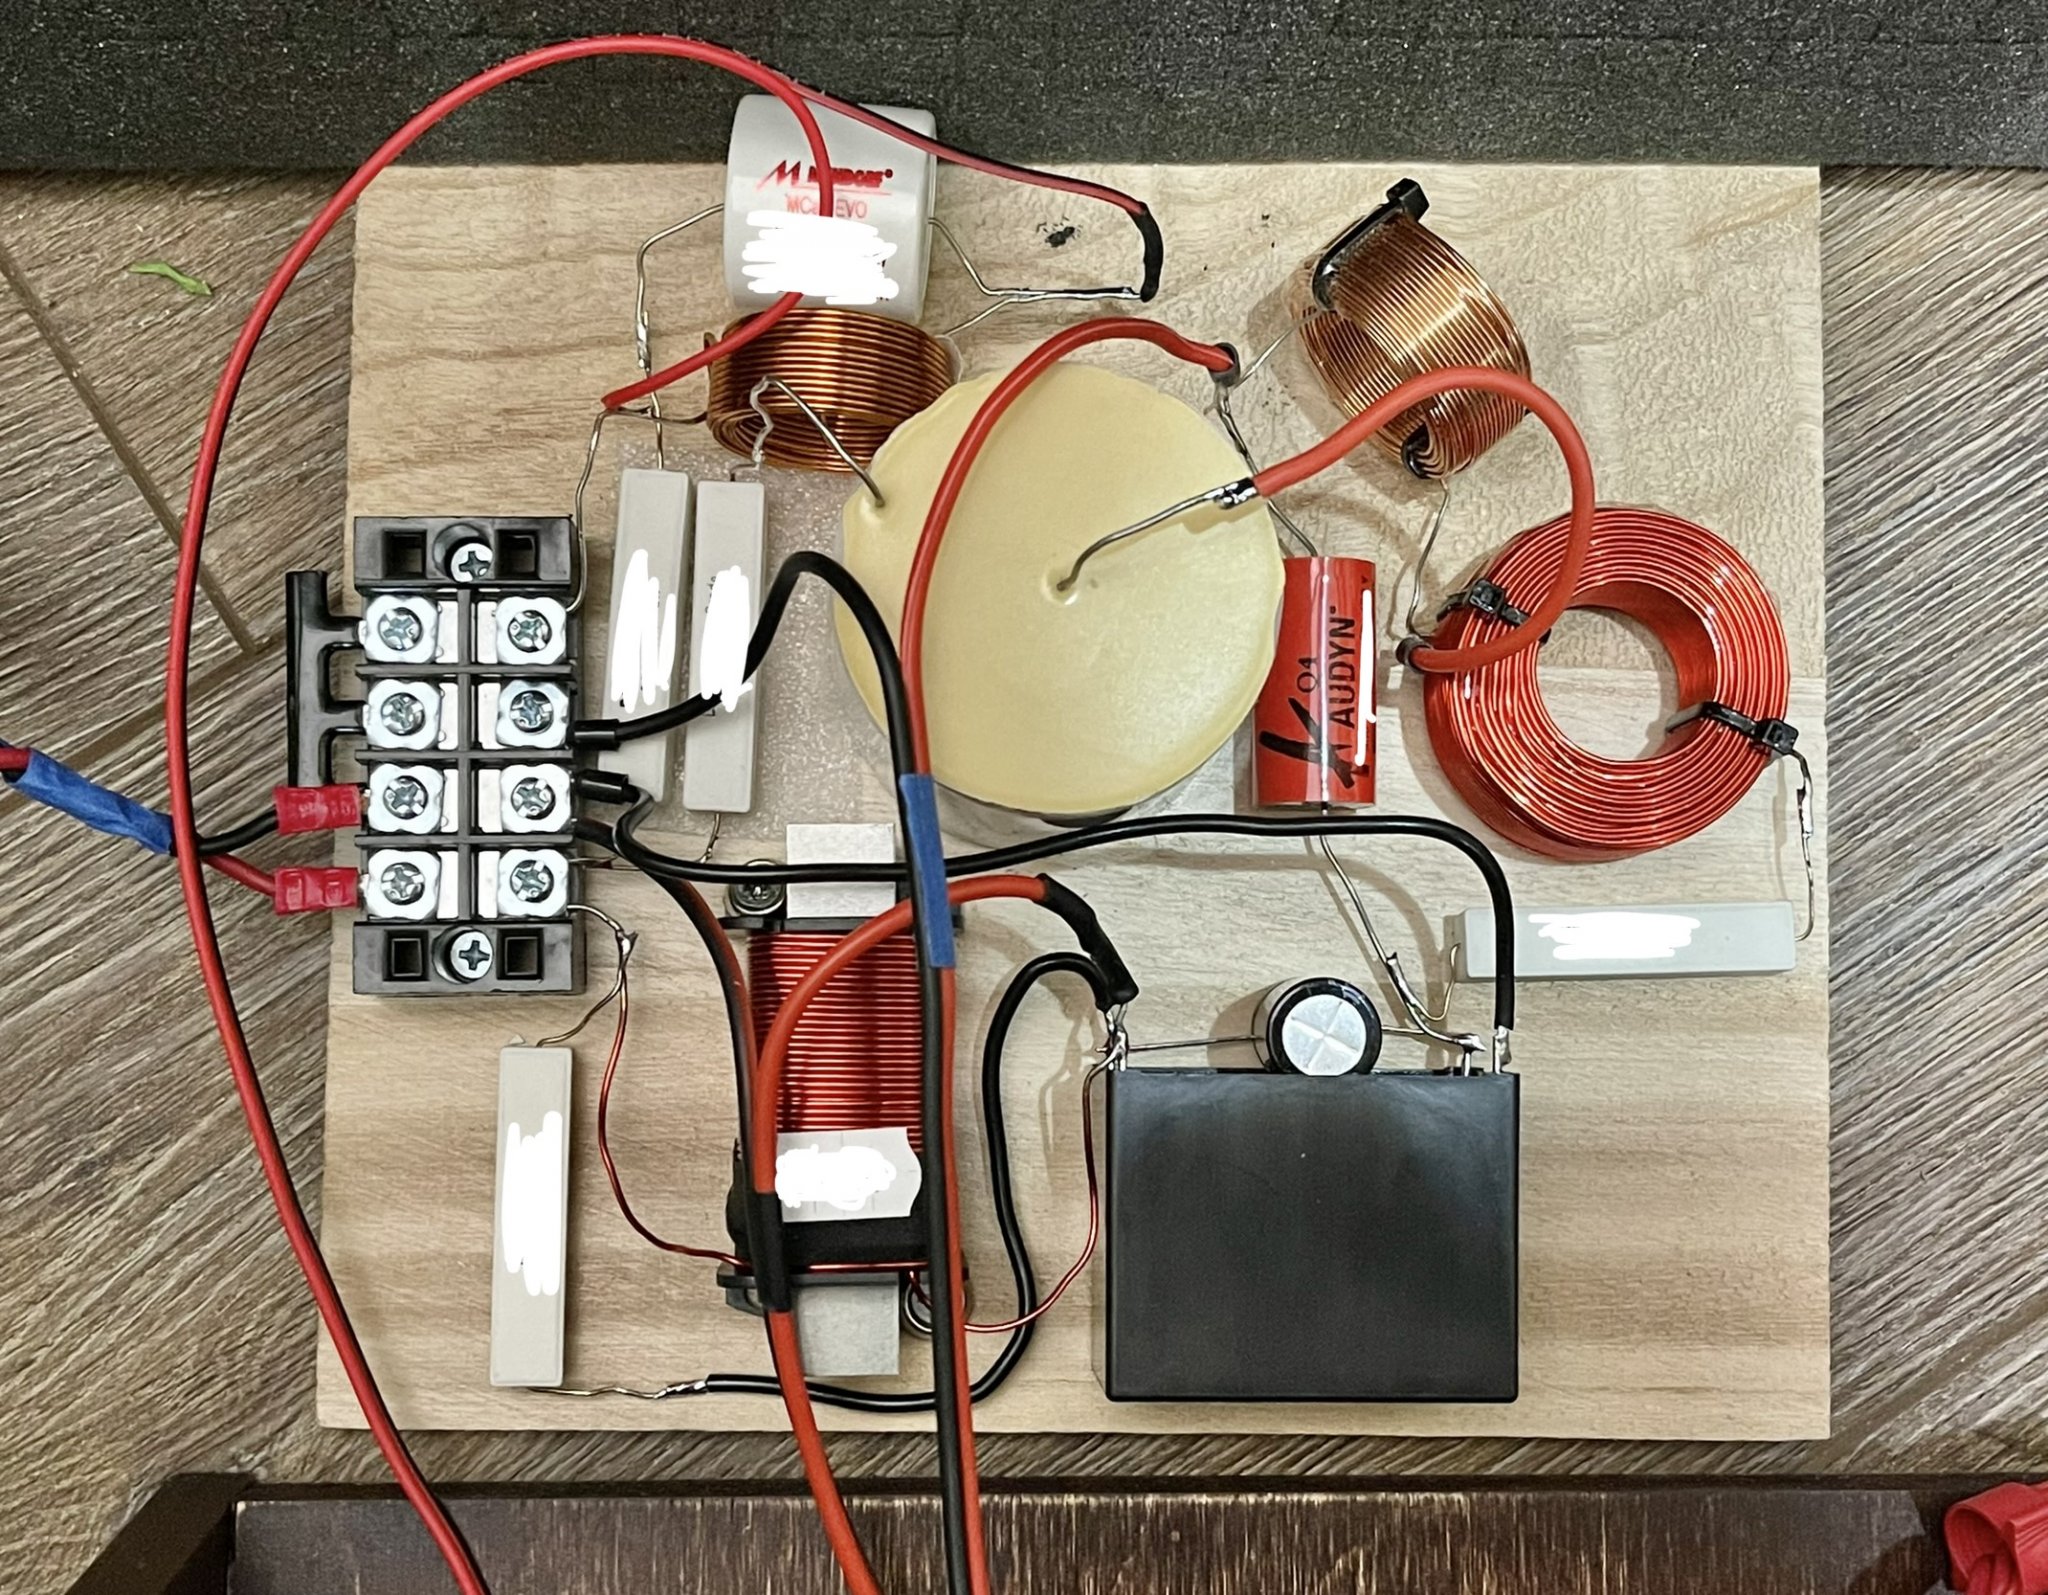
Remember to make the coils orthogonal in axis and placed father apart if possible.
You could also copy this placement - the 3 large film caps on the top are two for the woofer in parallel and one for the midrange high pass.

From post 1 is a good layout that seems to work.
Wires are: input from amp is on left, tweeter is on top, midrange out is wire on lower right side, bass is lower left side.
Remember to make the coils orthogonal in axis and placed father apart if possible.
You could also copy this placement - the 3 large film caps on the top are two for the woofer in parallel and one for the midrange high pass.
Last edited:
Wow! Beautiful and very professional looking job. You drilled an FRP (or phenolic) board and did P2P wiring underneath?
I appreciate your efforts to remove the part values before posting the photo. (I would ask others to do the same if you want to post photos of your XO - thanks).
I appreciate your efforts to remove the part values before posting the photo. (I would ask others to do the same if you want to post photos of your XO - thanks).
Almost finished, 4 zip ties still missing... but at the end it will look like this:

And some p2p wiring. I always drill the legs together and when I use a wire, I insert the blank wire to the leg and only then do I solder them together,
so that the metallic connection is made by the material of the wire and the parts leg, and not by the solder.

And some p2p wiring. I always drill the legs together and when I use a wire, I insert the blank wire to the leg and only then do I solder them together,
so that the metallic connection is made by the material of the wire and the parts leg, and not by the solder.
Please ignore the mess, I have to store the speakers in the basement for now as I have an event at the home next weekend. But, the finish is lovely on these cabinets, he's indeed a master craftsman (thanks for the recommendation again, X!). I am still deciding on which way to go for the finish.. thinking about Watco danish oil or monocoat. Anyway, here are some photos for now:Many thanks Veeresh! I'm curious about the progress of your build.
EDIT: The photos and the light really don't do justice to how good they look and feel in person.
I am closer to X than to the cabinet maker, but it's not that bad. He's about 40 odd miles away and I love driving there on a Sunday morning as it's peaceful with less traffic and the drive is really nice (country side). These are probably going to be my main speakers and I wanted them done by someone who knows what they're doingWow those look phenomenal! I assume you must be within a relatively close distance to X's cabinet maker? As I get closer to starting, I wonder if it would just be better to go with a professional for these.
") .
.