

Repair of a vintage driver (Richard Allan)
Posted 6th October 2014 at 10:30 AM by googlyone
Over the last 6 or so months I have built a nice little sub plus satellite system that comprises:
- The "Ikea Salad Bowl Speakers", with some really nice vifa premium line drivers in them, making these 1980's vintage
- A Richard Allan subwoofer, in which I used a 1970's (I guess) HP12B driver, in a complex cubical enclosure with a corner cut off for the driver, and
- A ridiculously complex amplifier built to drive this lot, with DSP, multiple channels, optimised even to the point of addressing the fact the HP12B is 16 Ohms, and running bridged for that output.
So imagine my reaction when last night I settled back and ran the system up "properly" for maybe the second or third time, and CRACK!!!
My initial thought was that I had over "excursioned" the sub, and the voice coil was hitting the magnet backplate. I dug into the amplifier and programmed a subsonic filter, as you do, and settled back in again. CRACK!
Damn! on fiddling, I concluded that either the voice coil was burnt out or a winding loose.
Time for surgery...
Firtly to get a look inside the driver. My approach is to:
(1) Get the spider up from the frame, so I can see the coil. Once you do this you need to;
(2) Access the pole piece and coil gap, as once the spider is loose, you need to realign the coil in the gap.
So loosening things up...
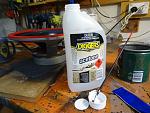
I started trying toluene, but acetone did a great job of dissolving the glue. Just don't smoke or breathe too deeply!
This quickly showed the following:
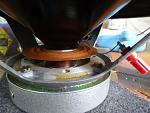


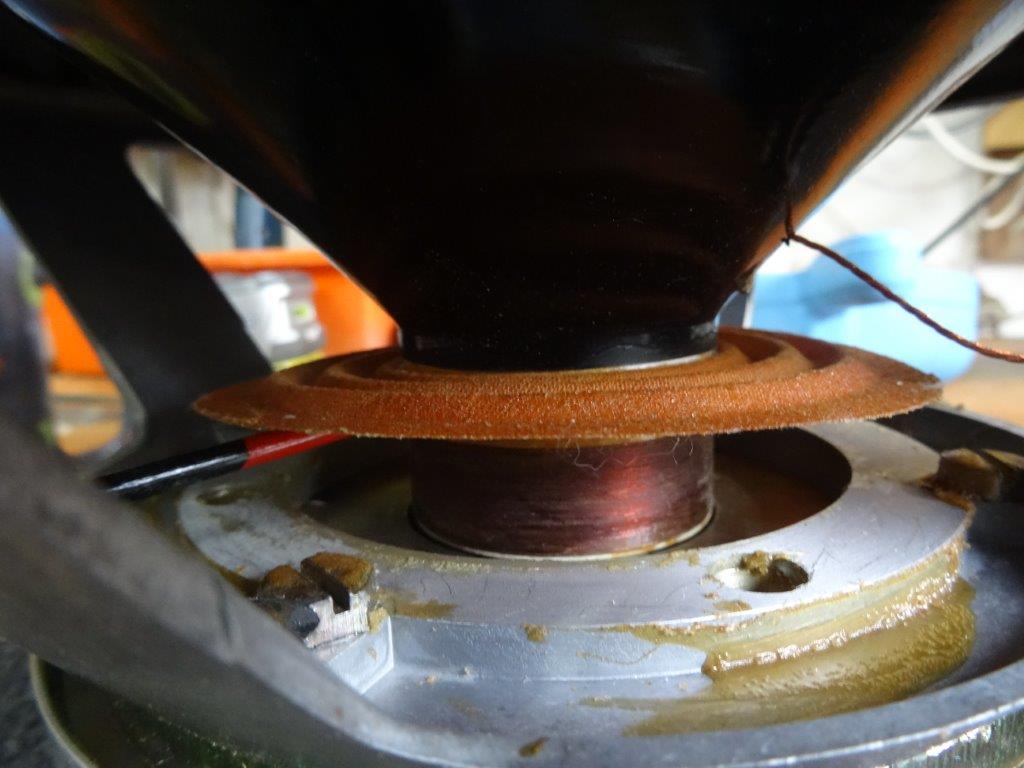
Hmmm. The spider had come unglued from the voice coil former.
This was really a best case outcome, as the voice coil itself was in one piece. Though as can be seen it is a bit messy. My conclusion on inspecting it was that it had probably been driven pretty hard at some time, but not so much as to cause real damage, and that when it was manufactured, it was probably left with uneven amounts of glue.
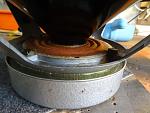
The coil gap itself was clean, interestingly the gap on this driver is TIGHT!
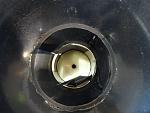
A single layer of Xray was absolutely all I could fit. I guess this is good in terms of the underlying quality of manufacture. It does however leave you precious little room for mistakes as you get things back together again!
After a bit of surfing around and reading I concluded that some contact adhesive I had would be the go - hough I came damn close to going for high temperature epoxy.
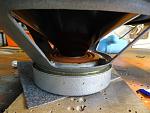
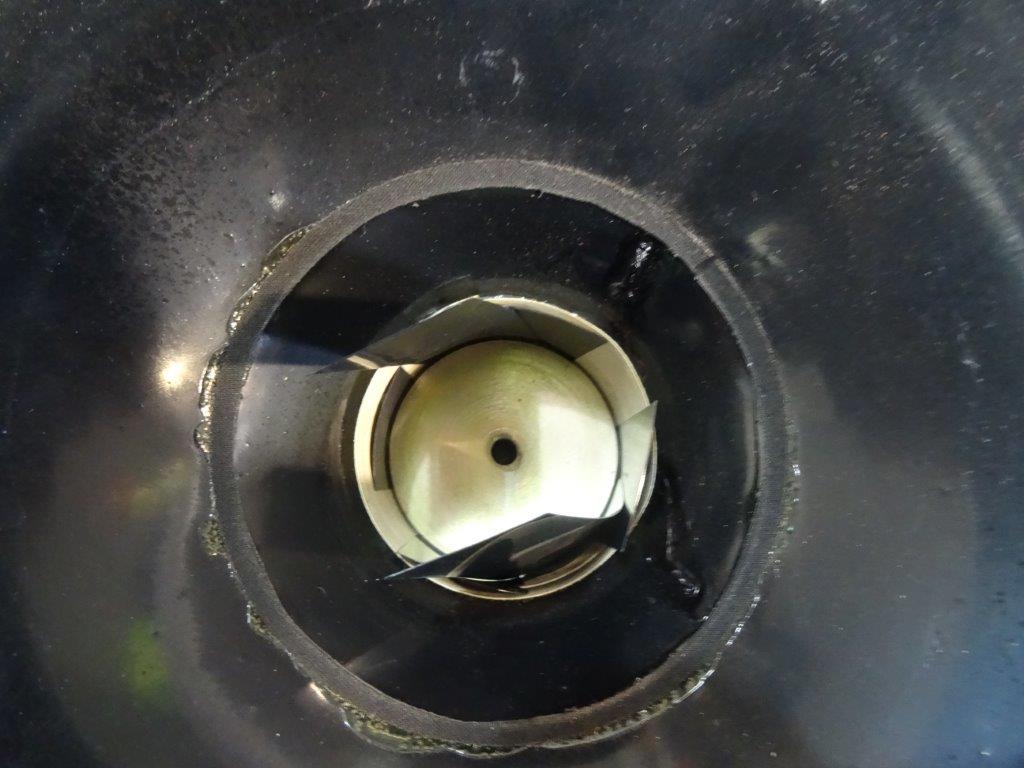
It was fiddly to get in, but by wedging the cone and poking with a thin piece of wood, there was room.
It all came out pretty OK...
I stuck the dust cap back on with black rubber adhesive - it will never be a thing of beuaty, but I rather doubt a casual observer would pick the repair.
Now I need to let things settle down and dry, before going back for a proper power test.
I am always a little hesitant after doing serious surgery like this, but I guess it is not much different to doing a recone.
Things I do know now are:
- The voice coil is OK, if a little daggy.
- The coil is aligned in the airgap
- The spider is properly glued on
Oh, I also measured the voice coil at close to 18mm long, which is remarkable in a driver of this age. I am really hoping that the repair is reliable, as this is a good little subwoofer from long before people even thought of using them seriously!
- The "Ikea Salad Bowl Speakers", with some really nice vifa premium line drivers in them, making these 1980's vintage
- A Richard Allan subwoofer, in which I used a 1970's (I guess) HP12B driver, in a complex cubical enclosure with a corner cut off for the driver, and
- A ridiculously complex amplifier built to drive this lot, with DSP, multiple channels, optimised even to the point of addressing the fact the HP12B is 16 Ohms, and running bridged for that output.
So imagine my reaction when last night I settled back and ran the system up "properly" for maybe the second or third time, and CRACK!!!
My initial thought was that I had over "excursioned" the sub, and the voice coil was hitting the magnet backplate. I dug into the amplifier and programmed a subsonic filter, as you do, and settled back in again. CRACK!
Damn! on fiddling, I concluded that either the voice coil was burnt out or a winding loose.
Time for surgery...
Firtly to get a look inside the driver. My approach is to:
(1) Get the spider up from the frame, so I can see the coil. Once you do this you need to;
(2) Access the pole piece and coil gap, as once the spider is loose, you need to realign the coil in the gap.
So loosening things up...

I started trying toluene, but acetone did a great job of dissolving the glue. Just don't smoke or breathe too deeply!
This quickly showed the following:


Hmmm. The spider had come unglued from the voice coil former.
This was really a best case outcome, as the voice coil itself was in one piece. Though as can be seen it is a bit messy. My conclusion on inspecting it was that it had probably been driven pretty hard at some time, but not so much as to cause real damage, and that when it was manufactured, it was probably left with uneven amounts of glue.
The coil gap itself was clean, interestingly the gap on this driver is TIGHT!
A single layer of Xray was absolutely all I could fit. I guess this is good in terms of the underlying quality of manufacture. It does however leave you precious little room for mistakes as you get things back together again!
After a bit of surfing around and reading I concluded that some contact adhesive I had would be the go - hough I came damn close to going for high temperature epoxy.
It was fiddly to get in, but by wedging the cone and poking with a thin piece of wood, there was room.
It all came out pretty OK...


I stuck the dust cap back on with black rubber adhesive - it will never be a thing of beuaty, but I rather doubt a casual observer would pick the repair.
Now I need to let things settle down and dry, before going back for a proper power test.
I am always a little hesitant after doing serious surgery like this, but I guess it is not much different to doing a recone.
Things I do know now are:
- The voice coil is OK, if a little daggy.
- The coil is aligned in the airgap
- The spider is properly glued on
Oh, I also measured the voice coil at close to 18mm long, which is remarkable in a driver of this age. I am really hoping that the repair is reliable, as this is a good little subwoofer from long before people even thought of using them seriously!
Total Comments 3
Comments
-

 Nice job googlyone. Was it a success?
Tony.Posted 27th October 2014 at 11:14 AM by wintermute

-
Yes, the repair worked well. It is back in its box and running.
I have repaired a number of speakers over the years, recons are straightforward if fiddly. The hard ones have been old drivers. One real challenging one was a wharfedale driver with a burnt out voice coil.
That one I had to cut the original voice coil out and make a new one. I might have been able to buy one (it would have saved me a lot of fiddling if I did!) but in the end I mad a mandrel and wound one myself.
It took three tries to get one the right diameter, and I am sure the power handling has been compromised by me using a post-it-note as the paper coil former. But the motor assembly now runs well.
Then I found that the magnet needs to be recharged.... so back into the repair queue with that one!
PhilPosted 31st October 2014 at 09:56 PM by googlyone
-
OK that is hardcore!!
 My first driver repair was a 12 " open back speaker that I found at the tip. The cone was falling apart and I stuck it back together with watered down pva glue and tissue paper! I Then ran it off my clock radio
  Other than that I've only repaired the suround (badly) on one of my drivers in my MTM's... need to revisit that one.
Oh come to think of it I did pull my Phillips dome mids apart thinking I'd burnt out the voice coils only to find that a good clean and re-assembly fixed their distortion issue.
Hat's off to your persistence!
Tony.Posted 4th November 2014 at 07:27 AM by wintermute

