

DIY ES9018 DAC + LM4780 AMP Details part 5
Posted 6th January 2015 at 12:28 PM by Maciej Czerwinski
Updated 6th January 2015 at 12:36 PM by Maciej Czerwinski
Updated 6th January 2015 at 12:36 PM by Maciej Czerwinski
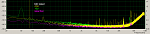
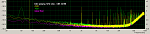
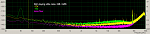
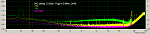
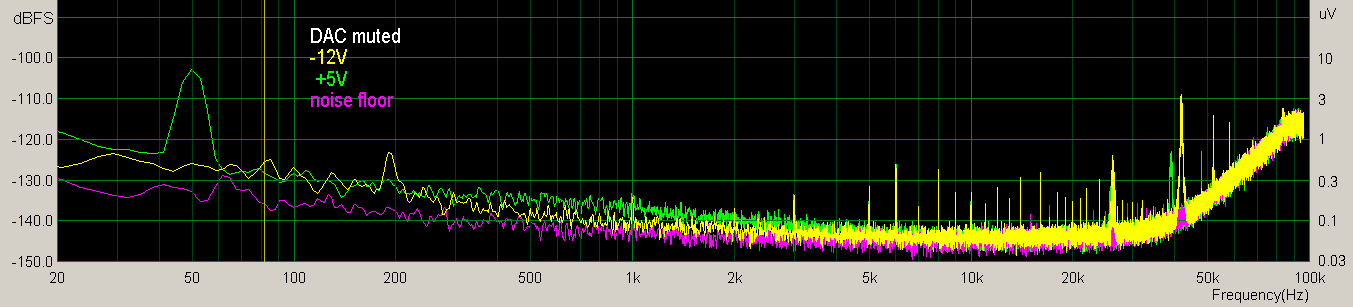
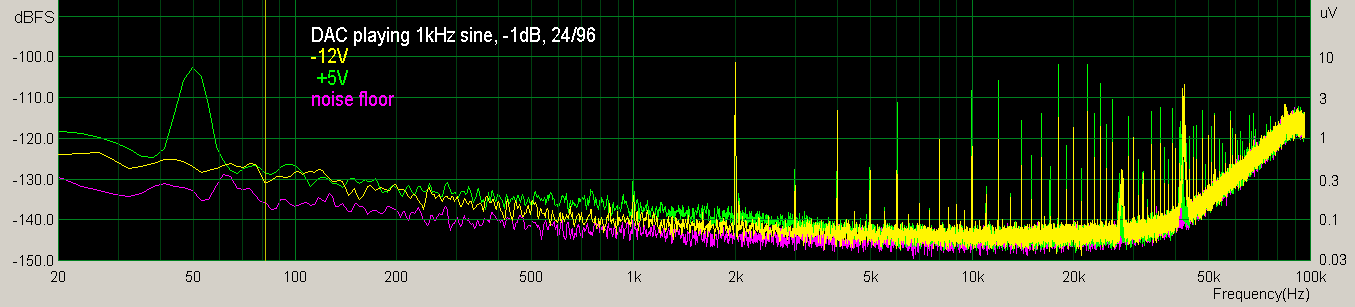
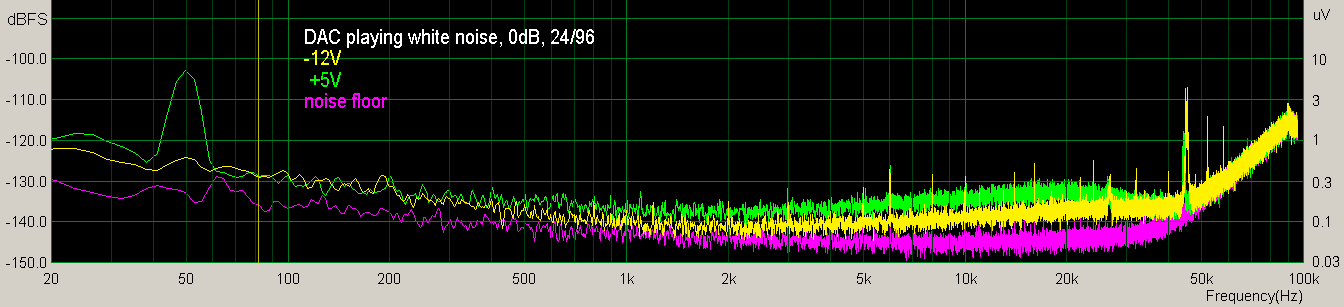
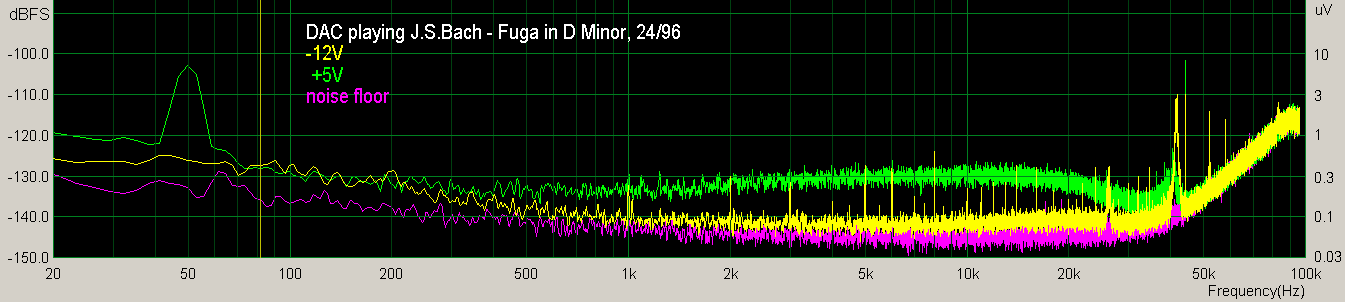
Graphs showing the dac power supply output noise. You can see the SMPS switching frequency noise peaks at 26kHz and 32kHz. Their frequency rise a little when more current is drawn from the supply. It seems that the dac playing 1kHz is an example of the hardest load to regulate for the supply:
VOLUME CONTROLLER:
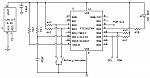
It’s a PIC16F84 running a program written by me. It reads rotary encoder and accordingly writes values, via I2C, to the ES9018 attenuation registers. It writes single value to all 8 registers every tick of the encoder. After 10 seconds of no encoder activity, it stores the value to the internal EEPROM of the microcontroller.
The controller board has its own 3.3V regulator, the display board has 1.8V regulator for LEDs
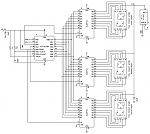
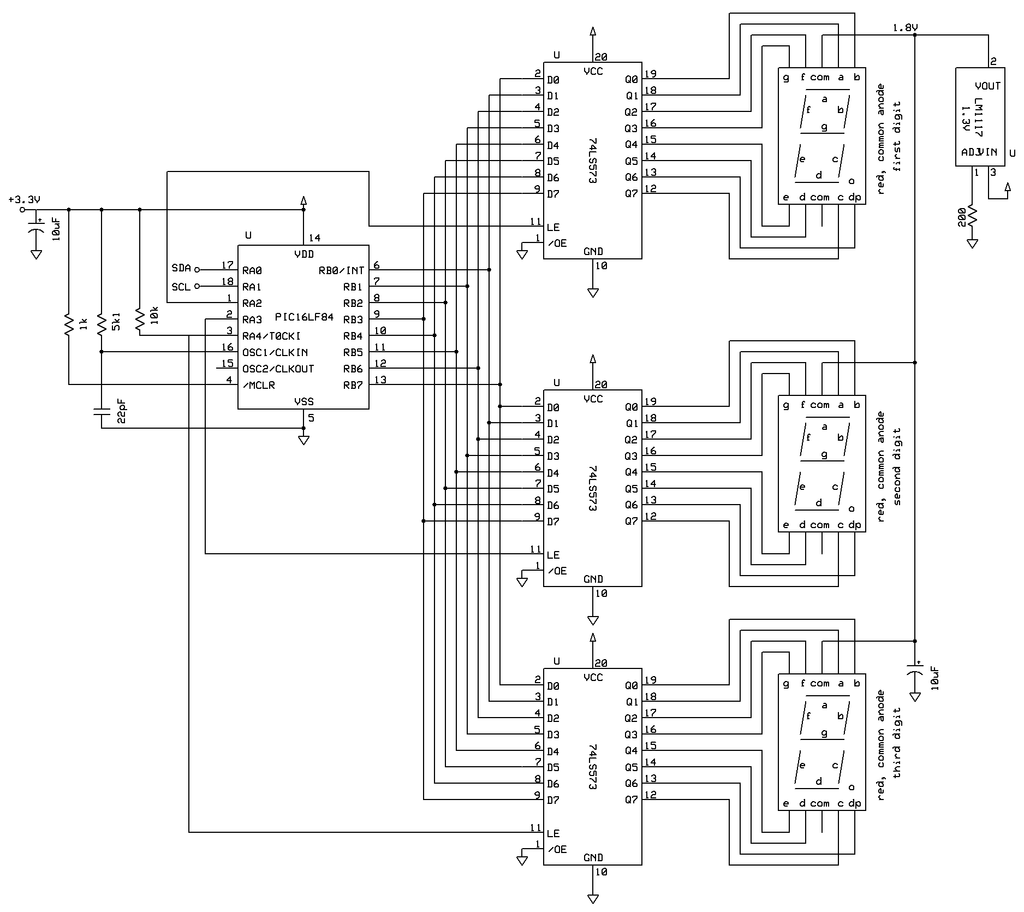
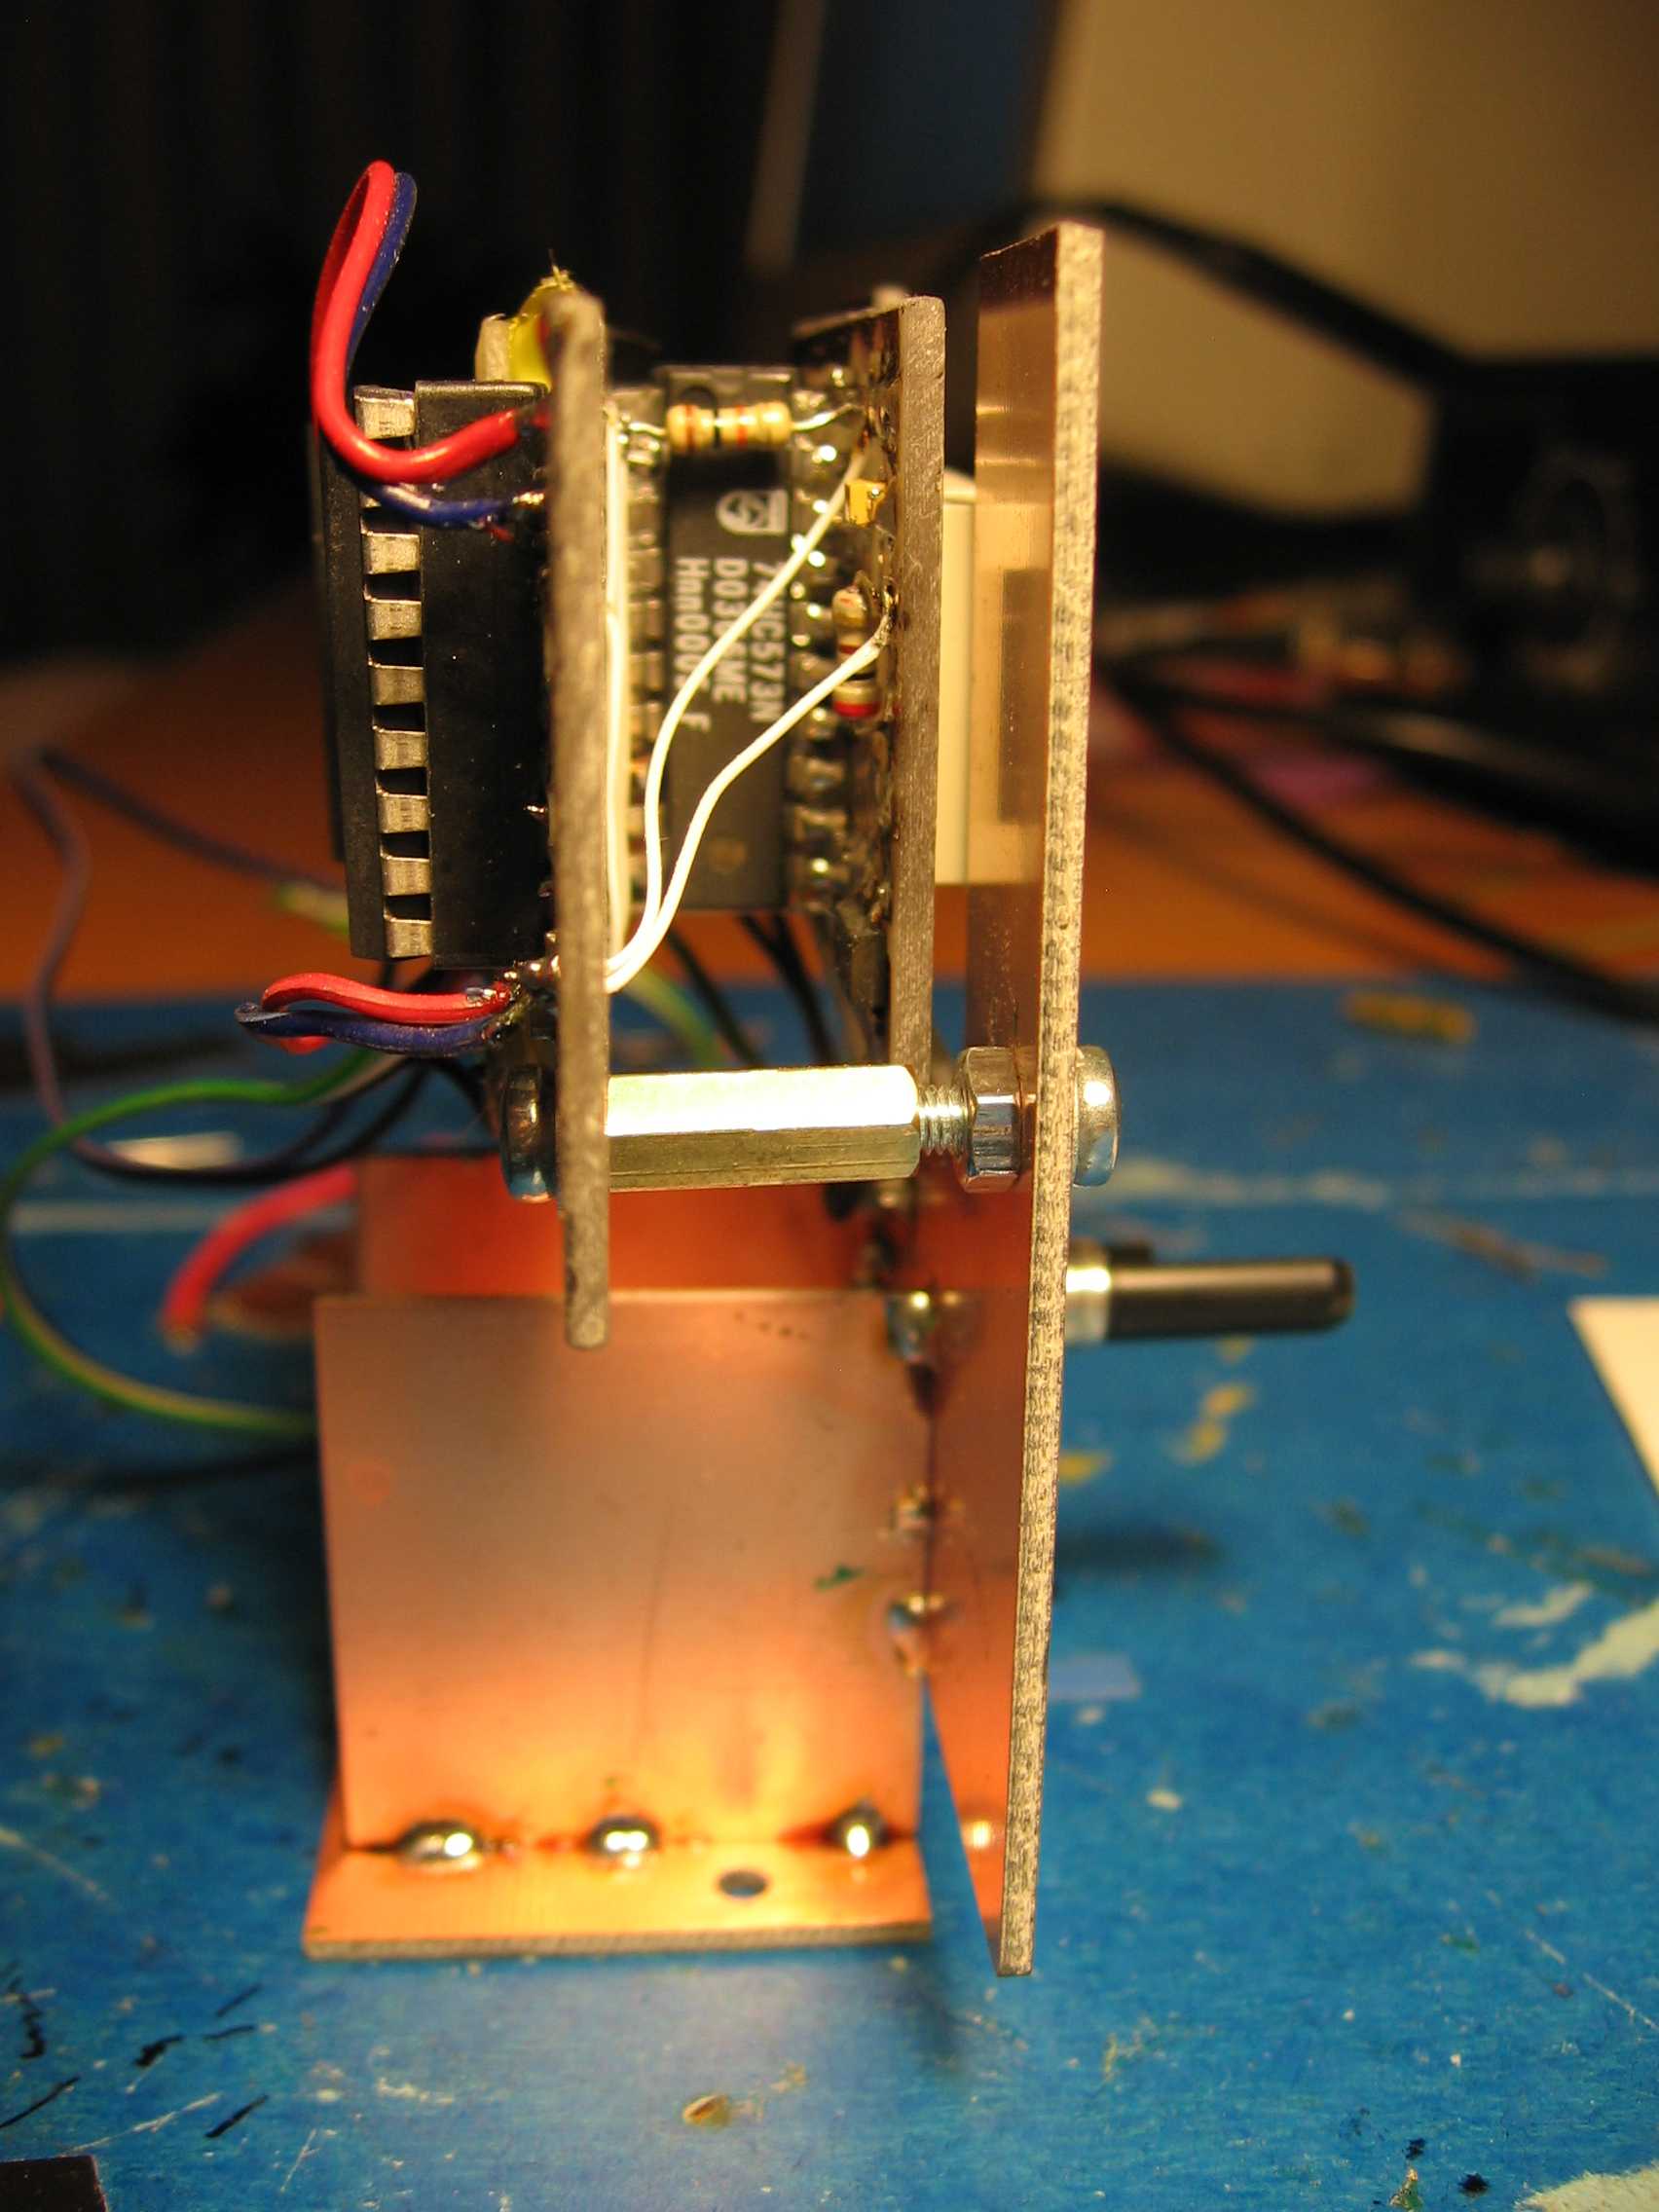
The display module is a separate I2C dumb reader. It catches the attenuation values transmitted via I2C and displays them on 3-digit LED display. It also uses PIC16F84 and three 74LS573 buffers for holding each digit data. More details and code for both devices here: https://www.diyaudio.com/forums/digital-line-level/249962-es9018-i2c-simple-volume-control.html
Controller schematics:
Display schematics:
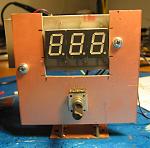
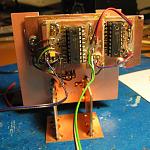
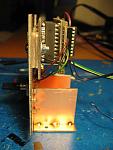
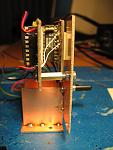
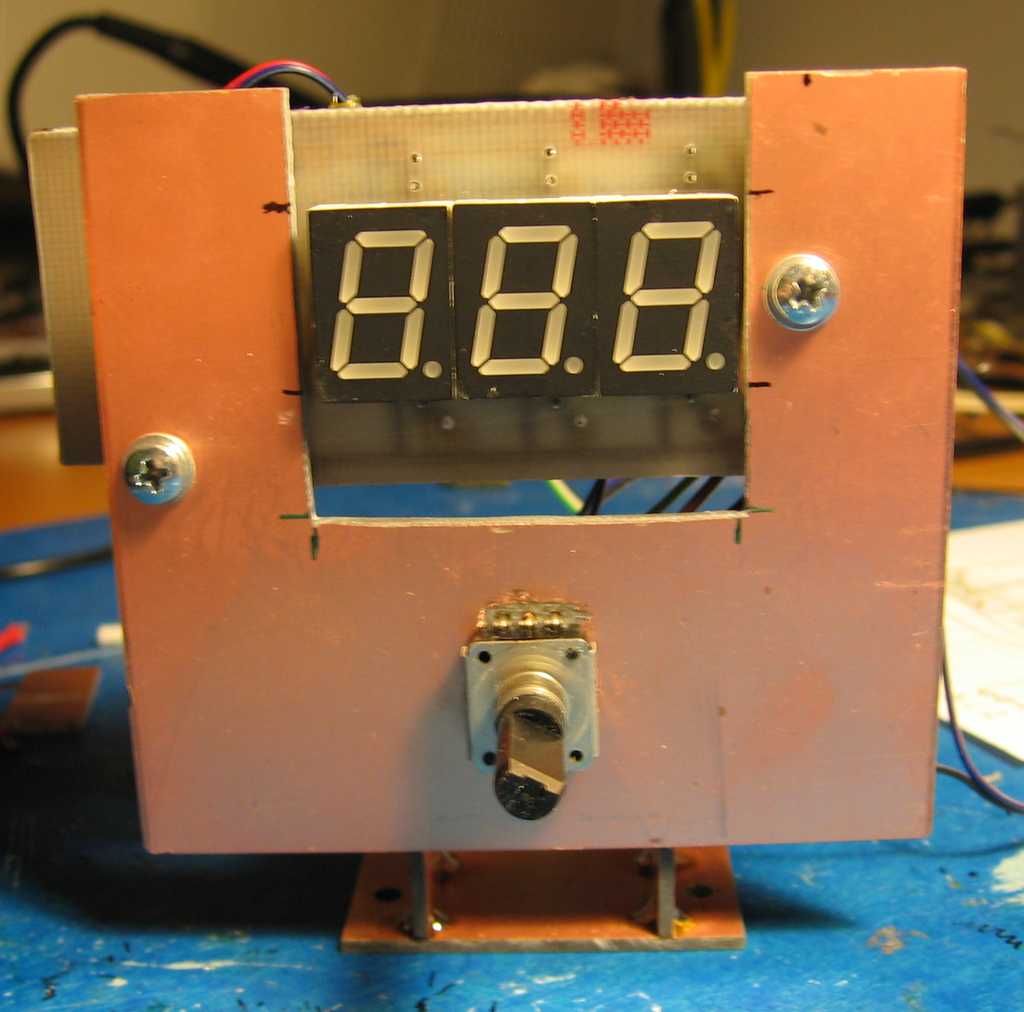
Construction details:
VOLUME CONTROLLER:
It’s a PIC16F84 running a program written by me. It reads rotary encoder and accordingly writes values, via I2C, to the ES9018 attenuation registers. It writes single value to all 8 registers every tick of the encoder. After 10 seconds of no encoder activity, it stores the value to the internal EEPROM of the microcontroller.
The controller board has its own 3.3V regulator, the display board has 1.8V regulator for LEDs
The display module is a separate I2C dumb reader. It catches the attenuation values transmitted via I2C and displays them on 3-digit LED display. It also uses PIC16F84 and three 74LS573 buffers for holding each digit data. More details and code for both devices here: https://www.diyaudio.com/forums/digital-line-level/249962-es9018-i2c-simple-volume-control.html
Controller schematics:

Display schematics:
Construction details:


Total Comments 0


