Go Back   Home > Forums > Blogs

Old

Phonoclone noise measurements

Posted 3rd October 2014 at 12:40 AM by rjm (RJM Audio Blog)
Updated 3rd October 2014 at 09:27 AM by rjm

What we are looking at here is the Fast Fourrier Transform (FFT) of the line output from my b-board buffer recorded at 24 bit, 96 kHz by an Onkyo SE-200PCI sound card. Upstream from the b-board is the Phonoclone 3 MC phono stage, connected to a Denon DL-103. The tonearm is Denon DA-307, and the deck is a Denon DP-2000.

Four recordings, taken 1) with music playing, 2) with the tonearm raised 3) with the phonoclone powered off and 4) with the b-board and all upstream components powered off.

True 24/96 data was obtained, measurements out to 48 kHz are possible, with -130 dB noise floor. (I was using Digionsound 6 to do the recording as Audacity truncates 24 bit recordings to 16 bit in Windows due to licensing issues. The FFT was generated in Audacity however.)

The soundcard's line input may have an impressive-looking low noise floor, but it's still useless for measuring line level audio devices like the b-board because the noise of the preamp/ADC...
Attached Thumbnails
Click image for larger version

Name:	phonoclone noise.png
Views:	433
Size:	65.1 KB
ID:	1395  
rjm's Avatar
rjm
diyAudio Member
Views 1277 Comments 0 rjm is offline
Old

New active speaker on order from Taobao

Posted 26th September 2014 at 02:49 AM by abraxalito
Updated 6th October 2014 at 02:44 AM by abraxalito

This one has dual TDA7265 chipamps and a nice 60VA toroidal trafo which should give better regulation than the normal EI type. Four electrolytics for the main PSU is encouraging. The opamps are socketed so opamp rolling is on the cards...

Update - received the speakers now. A quick listen showed the typical lack of dynamics opamp sound. After all they're only NJM4558s in there. So I shall re-jig the XO for TL082s by scaling up all the impedances and biassing the opamps into classA. Already all the through-hole caps have come out ready to be replaced by SMT types. The topology tends to suggest this may well be a clone of the D1010 which I'm already familiar with.

Update2 - modded the XO board but so far left the amp board 'as stock'. Mods are 11k resistors to VEE for classA bias, opamps swapped to TL082s, TL431 shunts installed to give +/-5V (from the regulated +/- 12V), plenty of 3,300uF caps across the supplies, 220uH inductors filtering from the shunts, impedances...
Attached Thumbnails
Click image for larger version

Name:	QQ Photo20140926095522.jpg
Views:	337
Size:	25.7 KB
ID:	1390   Click image for larger version

Name:	QQ Photo20140926095616.jpg
Views:	300
Size:	73.0 KB
ID:	1391   Click image for larger version

Name:	QQ Photo20140926095640.jpg
Views:	344
Size:	98.5 KB
ID:	1392   Click image for larger version

Name:	QQ Photo20140926095719.jpg
Views:	420
Size:	87.4 KB
ID:	1393   Click image for larger version

Name:	Phenix-XO-sch.jpg
Views:	308
Size:	68.5 KB
ID:	1394  

abraxalito's Avatar
diyAudio Member
Views 1198 Comments 2 abraxalito is offline
Old

Revisiting active speakers - HiVi D1010

Posted 21st September 2014 at 12:07 AM by abraxalito
Updated 24th September 2014 at 02:51 AM by abraxalito

Back in 2010 I spent many hours tweaking the D1080s with very satisfying results. However now with my Ozone variant DACs I have a far more transparent source than I did then and would like some demo kit which does the DAC justice whilst being fairly compact, portable and not too complex to mod. In 2011 a new smaller and even cheaper model arrived - the D1010 which has undergone some very minor modifications and is now in its mark IV incarnation. Like its older and bigger brother, its also a true active - it uses LM1875 clone ICs for the 100mm bass/mid and a tiny IC amp with a clip-on heatsink powered from a separately regulated supply for the 20mm tweeter. A fairly decent foundation for some extensive hot rodding.

On first connecting a pair of these up to the original portable Ozone (that's the one in the tea canister) I was impressed by the LF soundstage bloom that was reproduced but less than overwhelmed by what happened to the HF. Ragged would be a fair approximation, rather...
Attached Thumbnails
Click image for larger version

Name:	D1010amp.jpg
Views:	635
Size:	52.7 KB
ID:	1386   Click image for larger version

Name:	D1010back.jpg
Views:	284
Size:	25.7 KB
ID:	1387   Click image for larger version

Name:	D1010int.jpg
Views:	259
Size:	63.8 KB
ID:	1388   Click image for larger version

Name:	D1010-X).jpg
Views:	366
Size:	47.1 KB
ID:	1389  
abraxalito's Avatar
diyAudio Member
Views 1459 Comments 10 abraxalito is offline
Old

Apt-x try-out

Posted 27th August 2014 at 07:38 AM by Jaac

In the search for a nice Bluetooth module i found a chineese ebay shop that sells TTK Technologies modules.

Sure Electronics MB-CM15115

TTK Technologies partnumber BTM98-8AA. It says it will support Apt-x codec more info

I bought the module connected the power, leds are blinking,.... no descoverable devices in the bluetooth domain.
To be able to stream music from a pc i also bought a USB dongle Azio

Click the image to open in full size.
Jaac's Avatar
diyAudio Member
Posted in Uncategorized
Views 1451 Comments 0 Jaac is offline
Old

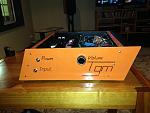
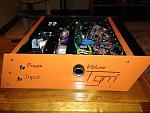
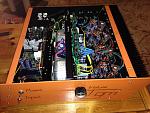
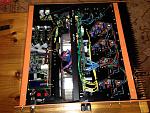
Retro Amp - final product

Posted 26th August 2014 at 01:18 PM by googlyone

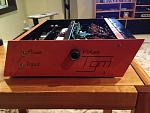
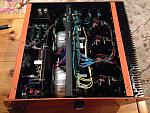
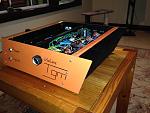
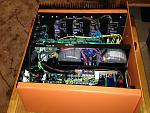
I finally got the retro am finished. At least to the point of all the parts set to work, the case built and assembled and wired up.

The photos really don't show just how orange it is, nor does he slant in the case "pop out" as much as it does in real life.

Click image for larger version

Name:	opr6-IMG_1842.jpg
Views:	302
Size:	126.2 KB
ID:	1376

Yes, I did the "writing" on the front panel by hand with a paintbrush.... I came close to getting the thing CNC milled, but concluded that the hand painted approach would be (a) fun, (b) a new challenge, and (c) more in line with a retro amp

Click image for larger version

Name:	opr3-IMG_1838.jpg
Views:	271
Size:	136.2 KB
ID:	1375

Click image for larger version

Name:	opr7-IMG_1843.jpg
Views:	368
Size:	182.1 KB
ID:	1377

Click image for larger version

Name:	opr8-IMG_1844.jpg
Views:	233
Size:	193.3 KB
ID:	1378

Click image for larger version

Name:	opr10-IMG_1846.jpg
Views:	215
Size:	170.1 KB
ID:	1379

Click image for larger version

Name:	opr11-IMG_1847.jpg
Views:	224
Size:	180.9 KB
ID:	1380

Click image for larger version

Name:	opr15-IMG_1852.jpg
Views:	201
Size:	143.1 KB
ID:	1381

Click image for larger version

Name:	opr16-IMG_1853.jpg
Views:	261
Size:	155.4 KB
ID:	1382

Click image for larger version

Name:	opr18-IMG_1856.jpg
Views:	222
Size:	197.8 KB
ID:	1383

The amplifier has:
- A digitiser on its input.

- DSP implementing crossover and...
diyAudio Member
Posted in Uncategorized
Views 1103 Comments 0 googlyone is offline
Old

I found some more suitable EDLCs

Posted 25th August 2014 at 06:09 AM by abraxalito
Updated 26th August 2014 at 07:52 AM by abraxalito

Many hours can be whiled away trawling through stuff on Taobao - most recently I've been browsing the selection of electrical double layer caps (aka EDLCs, supercaps).

I looked at supercaps many years ago when they first showed up in the Farnell catalogue, initially they were designed for back-up memory purposes and always had very high ESRs so weren't much good for power supplies where any kind of current is needed. That seems to have changed and now the caps are finding their way into all kinds of energy storage applications where high pulse currents are required. ESRs have dropped to where they're attractive for audio applications which call for a really stiff power supply down to low frequencies.

The current crop (in the pic) are made by Samwha (a Korean firm) and are really nice and affordable here - 4.5rmb a piece (about $0.70). That's for a 2.7V 100F size which comes in a 22mm diameter can, 45mm tall. A 7cap hexacap packs about the same energy and roughly...
Attached Thumbnails
Click image for larger version

Name:	Samwha100F.jpg
Views:	276
Size:	117.5 KB
ID:	1374  
abraxalito's Avatar
diyAudio Member
Views 1157 Comments 6 abraxalito is offline
Old

DIY Weller WSP80 / WP80 Soldering Station

Posted 24th August 2014 at 08:58 AM by googlyone

I have been using a pretty crappy "Dick Smith" soldering iron for - well too damn long. I have always been meaning to get a decent iron. Given the fact that it worked, and I have been using it for close on 30 years (if not more) resulted in me investing my time and money in other things.

I recently bought two WSP80 Weller soldering irons off ebay at a killer price.

These ate just the "pencil" part of the soldering iron, and need the power supply / controller. Which are not cheap.

Looking on the net there are a number of schematics of various weller power supply / controllers. But various bits and pieces were not quire right for the WPS80 that I had.

As a start I am using this...
Click image for larger version

Name:	Weller_WSP80_PSU.jpg
Views:	10045
Size:	220.9 KB
ID:	1373

This is evidently extremely analogue. Which is quick and easy to design and build, and analogue just warms the cockles of my heart.

The final product is like this......
Attached Thumbnails
Click image for larger version

Name:	opr1-IMG_1831.jpg
Views:	3333
Size:	89.2 KB
ID:	1371   Click image for larger version

Name:	opr2-IMG_1826.jpg
Views:	4241
Size:	110.9 KB
ID:	1372  
diyAudio Member
Posted in Uncategorized
Views 10081 Comments 2 googlyone is offline
Old

Windows volume control settings in dB.

Posted 23rd August 2014 at 11:33 AM by rjm (RJM Audio Blog)
Updated 6th July 2016 at 12:34 AM by rjm

I suppose everyone has at one point or another adjusted the volume sliders in Windows. The ones that go from 0-100, and you are never quite sure what whether its a boost, or an attenuation, or what.

Some years ago I measured the outputs and inputs using a fixed amplitude .wav file created in audacity and played back through the Onkyo SE-200PCI. I've taken another look at the worksheet I made and I've noticed that the volume settings correspond to very logical, even steps, namely:

100 0 dB
90 -1 dB
80 -2 dB
70 -3 dB
60 -4.5 dB
50 -6 dB
40 -8 dB
30 -10 dB
20 -14 dB
10 -20 dB

or for the mathematically inclined: 20*log(volume/100)

This scale is the same for both the output master volume and the line input, so its probably maintained throughout the operating system.

So now you know.

** note added much later,

My new soundcard,...
rjm's Avatar
rjm
diyAudio Member
Views 1266 Comments 1 rjm is offline
Old

Onkyo SE-300PCIe sound card review part II.

Posted 20th August 2014 at 02:18 PM by rjm (RJM Audio Blog)
Updated 23rd August 2014 at 06:21 AM by rjm

Part I is here.

Setup notes are in part I. Listening system downstream is the Sapphire headphone amplifier and Sennheiser HD-600 headphones. As the SE-300's line output routes though the Windows sound mixer, while the SE-200's bypasses it, it was not possible to keep the headphone amplifier volume at a constant setting between cards. Since I found the built-in headphone amplifier of the SE-300 to be good but not at the level of the Sapphire, only the stereo RCA output is being reviewed here.

Let me begin by saying that Windows is fundamentally an anti-audiophile proverbial dog's breakfast of setting and driver layers (quick, what's the difference between the DirectX and WaveOut sound modules?), and most soundcards are also anti-audiophile in that they cater to gamers and casual listening with a full barrel of virtualization, equalization, and reverb features enabled by default.* No surprise then that both cards require careful setup to sound their best, or,...
Attached Thumbnails
Click image for larger version

Name:	DSC_3283_00039s.jpg
Views:	485
Size:	218.4 KB
ID:	1369   Click image for larger version

Name:	DSC_3277_00035s.jpg
Views:	3239
Size:	320.4 KB
ID:	1370  
rjm's Avatar
rjm
diyAudio Member
Views 2067 Comments 0 rjm is offline
Old

DAC filter for discrete buffer

Posted 14th August 2014 at 11:44 PM by abraxalito
Updated 22nd August 2014 at 03:56 AM by abraxalito

Here's the next experiment - a higher working impedance anti-imaging filter which allows operation without any active voltage gain stage following it. Its also one you can build with Mouser parts - Fastron make inductors suitable for this - substitute their 27mH for the 30mH for only a modest degradation in the FR. Or add a Panasonic 2.7mH in series with the 27mH if you'd like to go the whole hog.

The frequency response is -3dB at 18.5kHz and about -55dB by 24.1kHz. Passband ripple is <0.3dB.

Update - after winding all the coils I realized that I don't have a system right now to slot a full bandwidth DAC into - mine at present is fully activated. So to test out the buffer design's audible qualities I need to build a limited bandwidth DAC (for my bass/mid, up to 3.5kHz). Hence another version of the bass/mid LPF is called for, with the highest possible working impedance. Turns out I can wind a 125mH coil with wire which doesn't break too easily (0.13mm dia)...
Attached Thumbnails
Click image for larger version

Name:	Discretebuf-filter.jpg
Views:	817
Size:	35.8 KB
ID:	1365   Click image for larger version

Name:	DACdiscreteRF.jpg
Views:	347
Size:	85.5 KB
ID:	1366   Click image for larger version

Name:	3k5LPF1800.jpg
Views:	502
Size:	31.4 KB
ID:	1367  
abraxalito's Avatar
diyAudio Member
Views 1512 Comments 1 abraxalito is offline

New To Site? Need Help?
Copyright ©1999-2017 diyAudio